My photos are sorted in a simple directory structure. Sometimes these directories are quite big, but I had chalked it up to there being more files in the larger ones. What I did not think of is the impact that noise has on file size. Some of my JPEGs shot in dark conditions were 20MB in size, while others shot in better lighting conditions typically are around 4MB. This started my crusade to find and denoise the worst offending files. Up to this point I had not done any noise reduction on my photos, except to experiment with it ones or twice. However, now I was on a space saving mission.
Below I go through the technique I use to reduce the noise in my images. If you have any tips, then please share them in the comment field below, or send a message using the form on the “Using Photos” page linked in the menu above.
I use Photoshop’s built in CameraRAW which ones when you click on the NEW file to do my noise reduction.
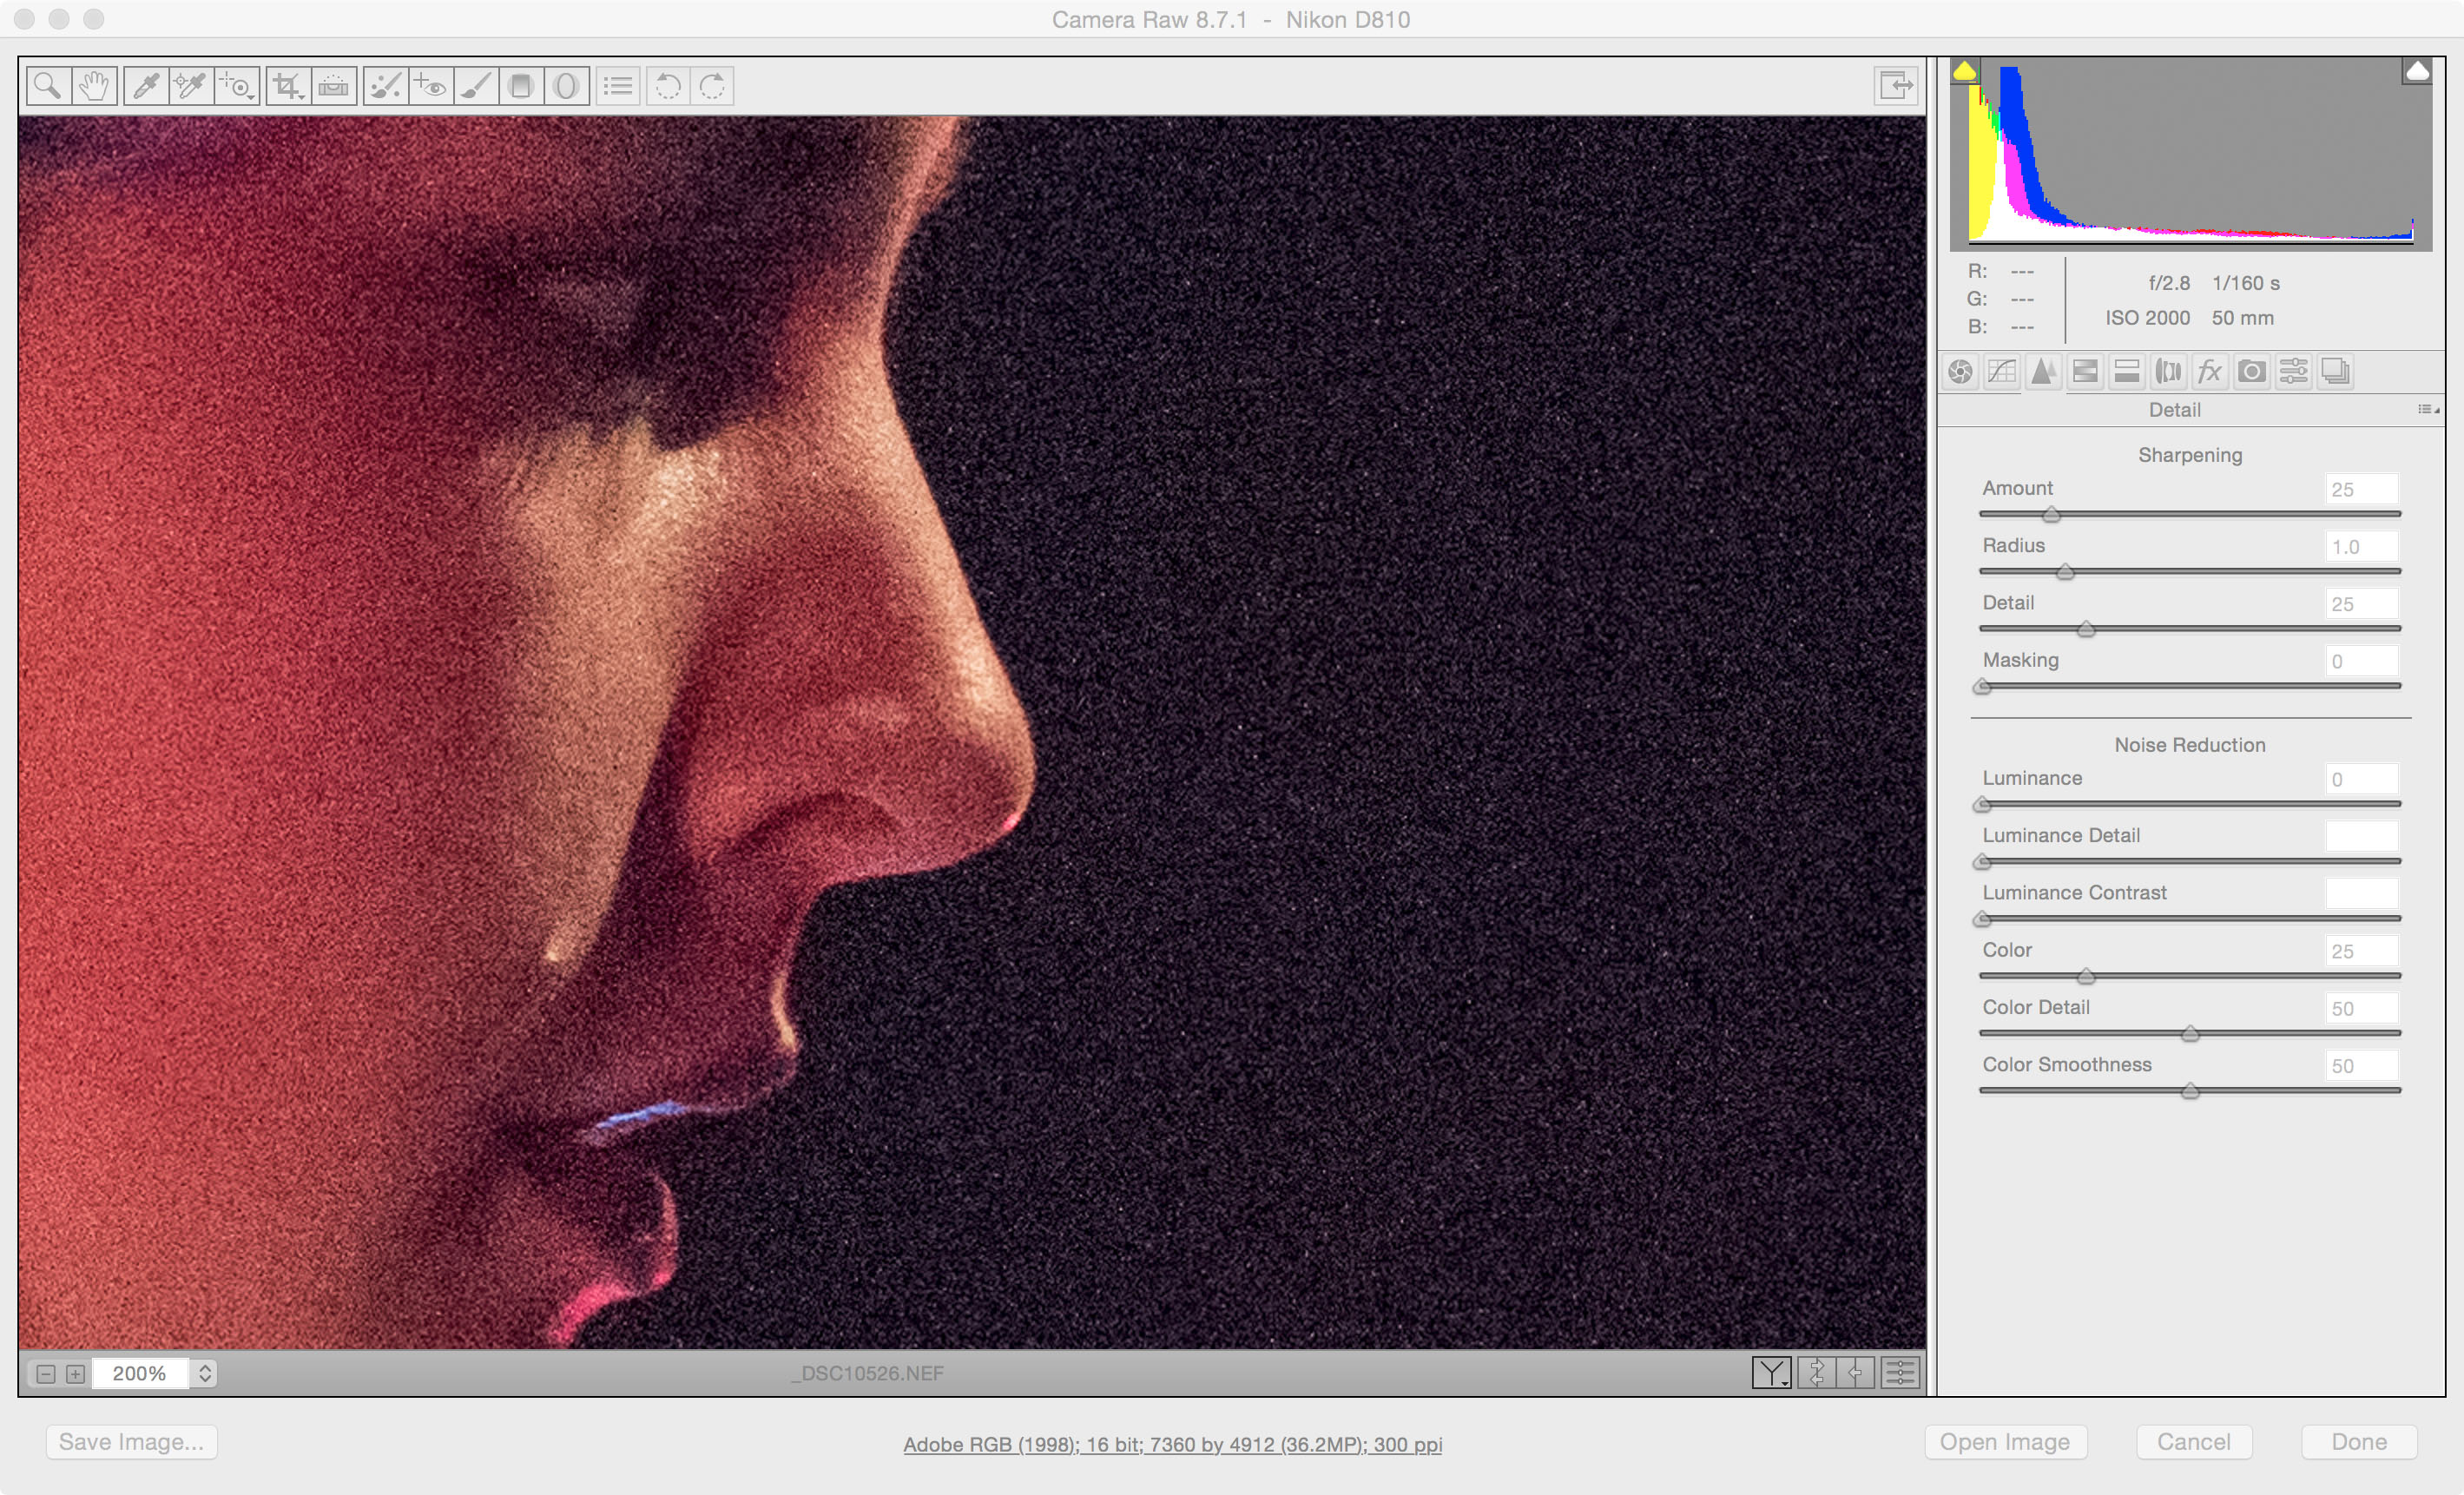
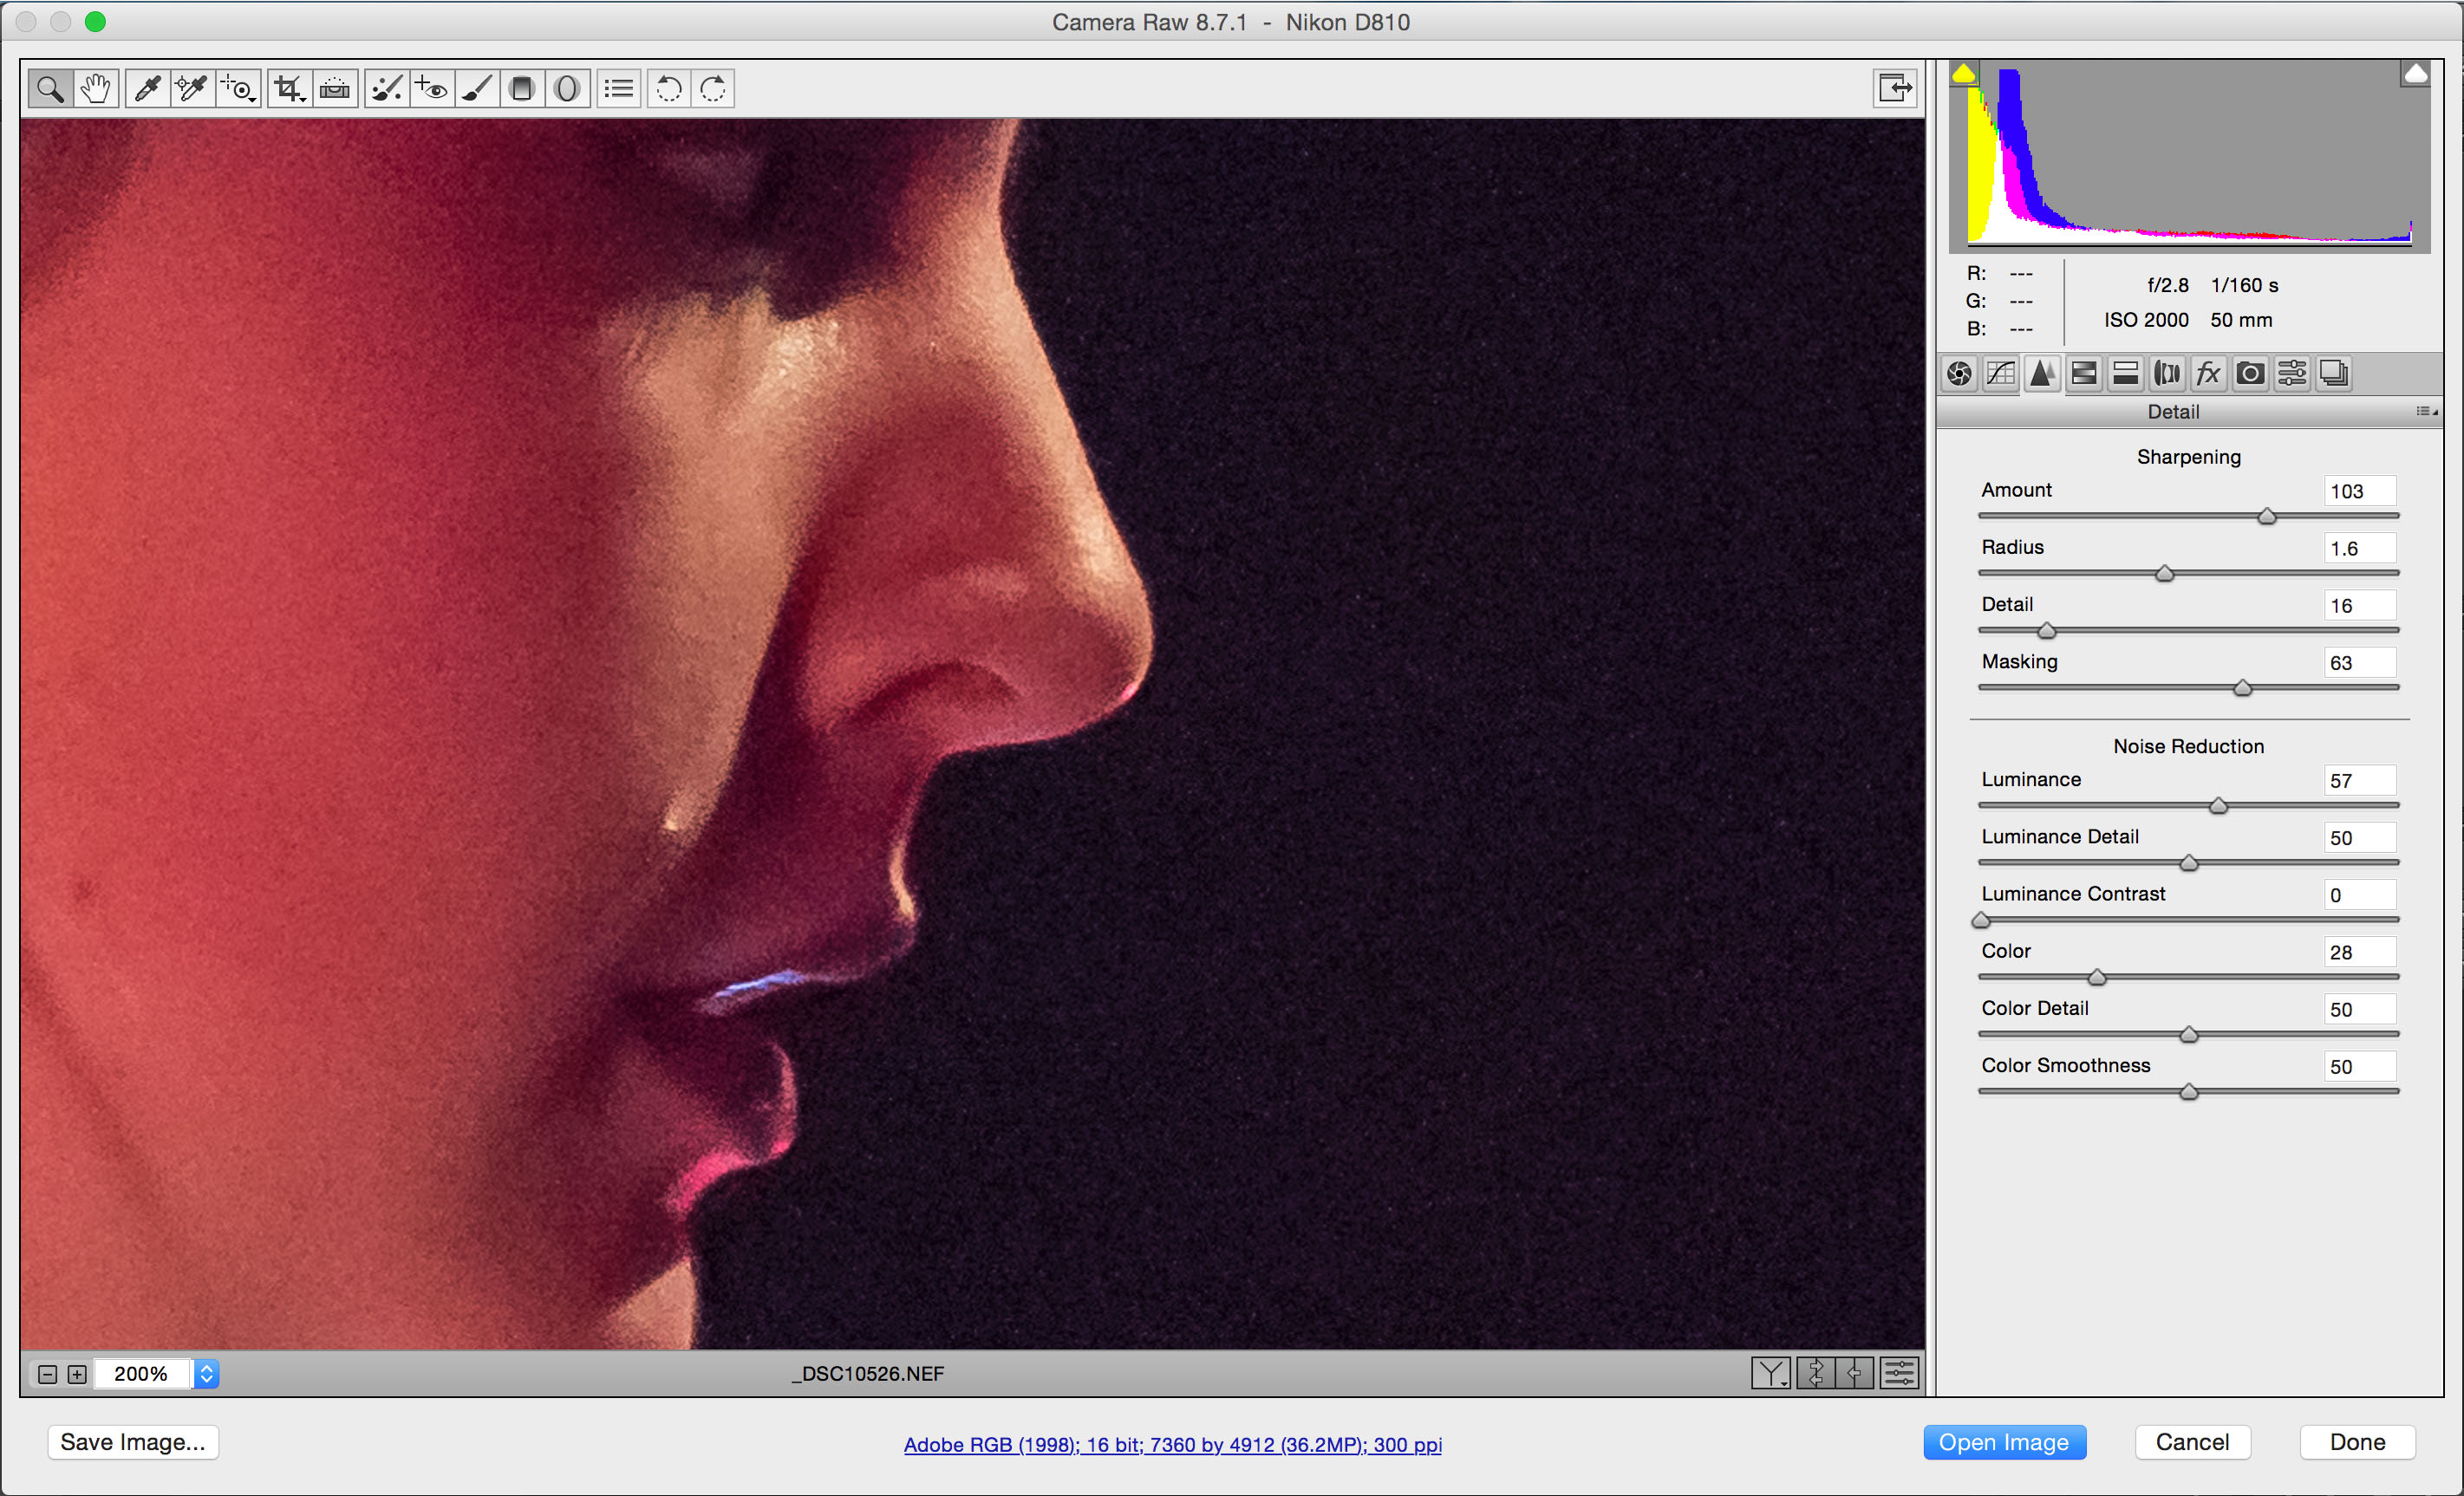
1. Zoom in to the face of your subject. Noise reduction will degrade the sharpness of your photo, and you want to make sure you do not go too far in your pursuit of smooth skin and noise free shadows. Click on the Detail tab to the right, to bring up the noise reduction panel. If you want to see this image larger, just click on it to see it in full size.
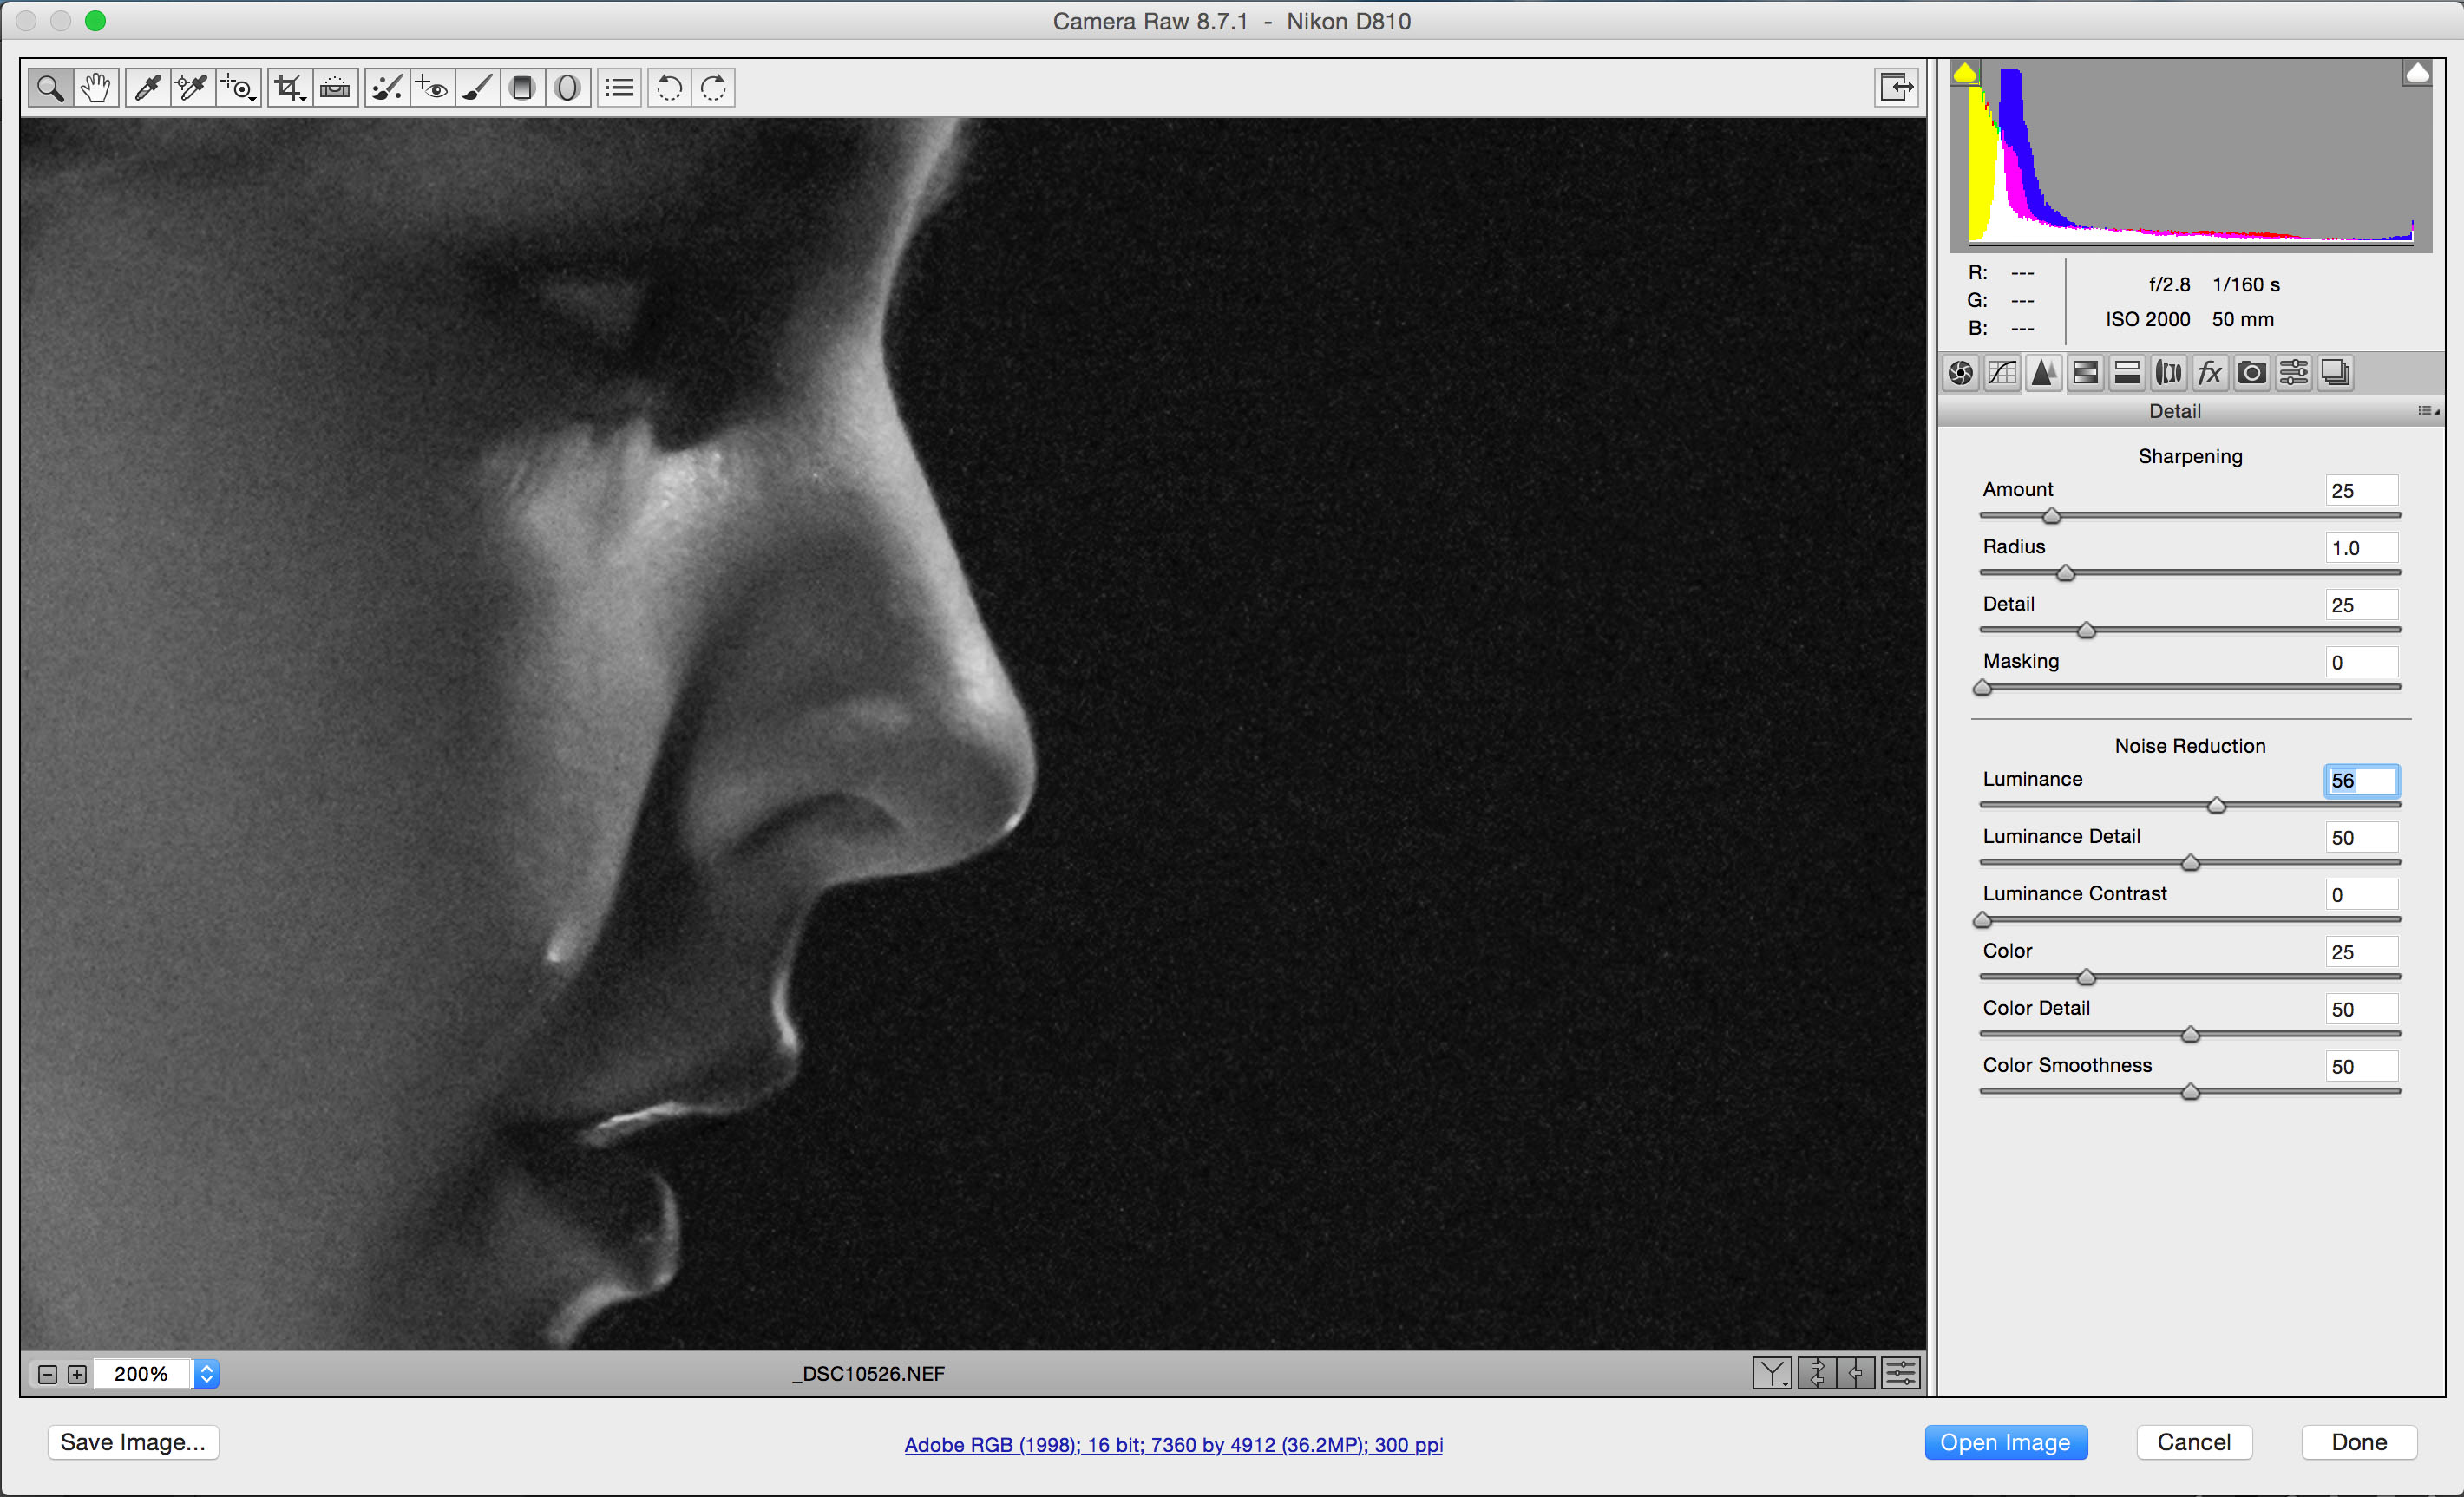
2. By holding down the alt key when you move the luminance slider you can see a black and white version of the image. I move the slider until the bright noise specks disappear from the shadow parts.
3. Next I bring up the amount of sharpening. Again, holding down alt while you do it shows a black and white version of the photo. My rule of thumb is to increase it until you have undone what you just did with the luminance slider. The reason for this is that in the next step we will apply a mask, so that the sharpening is only done in parts of the image.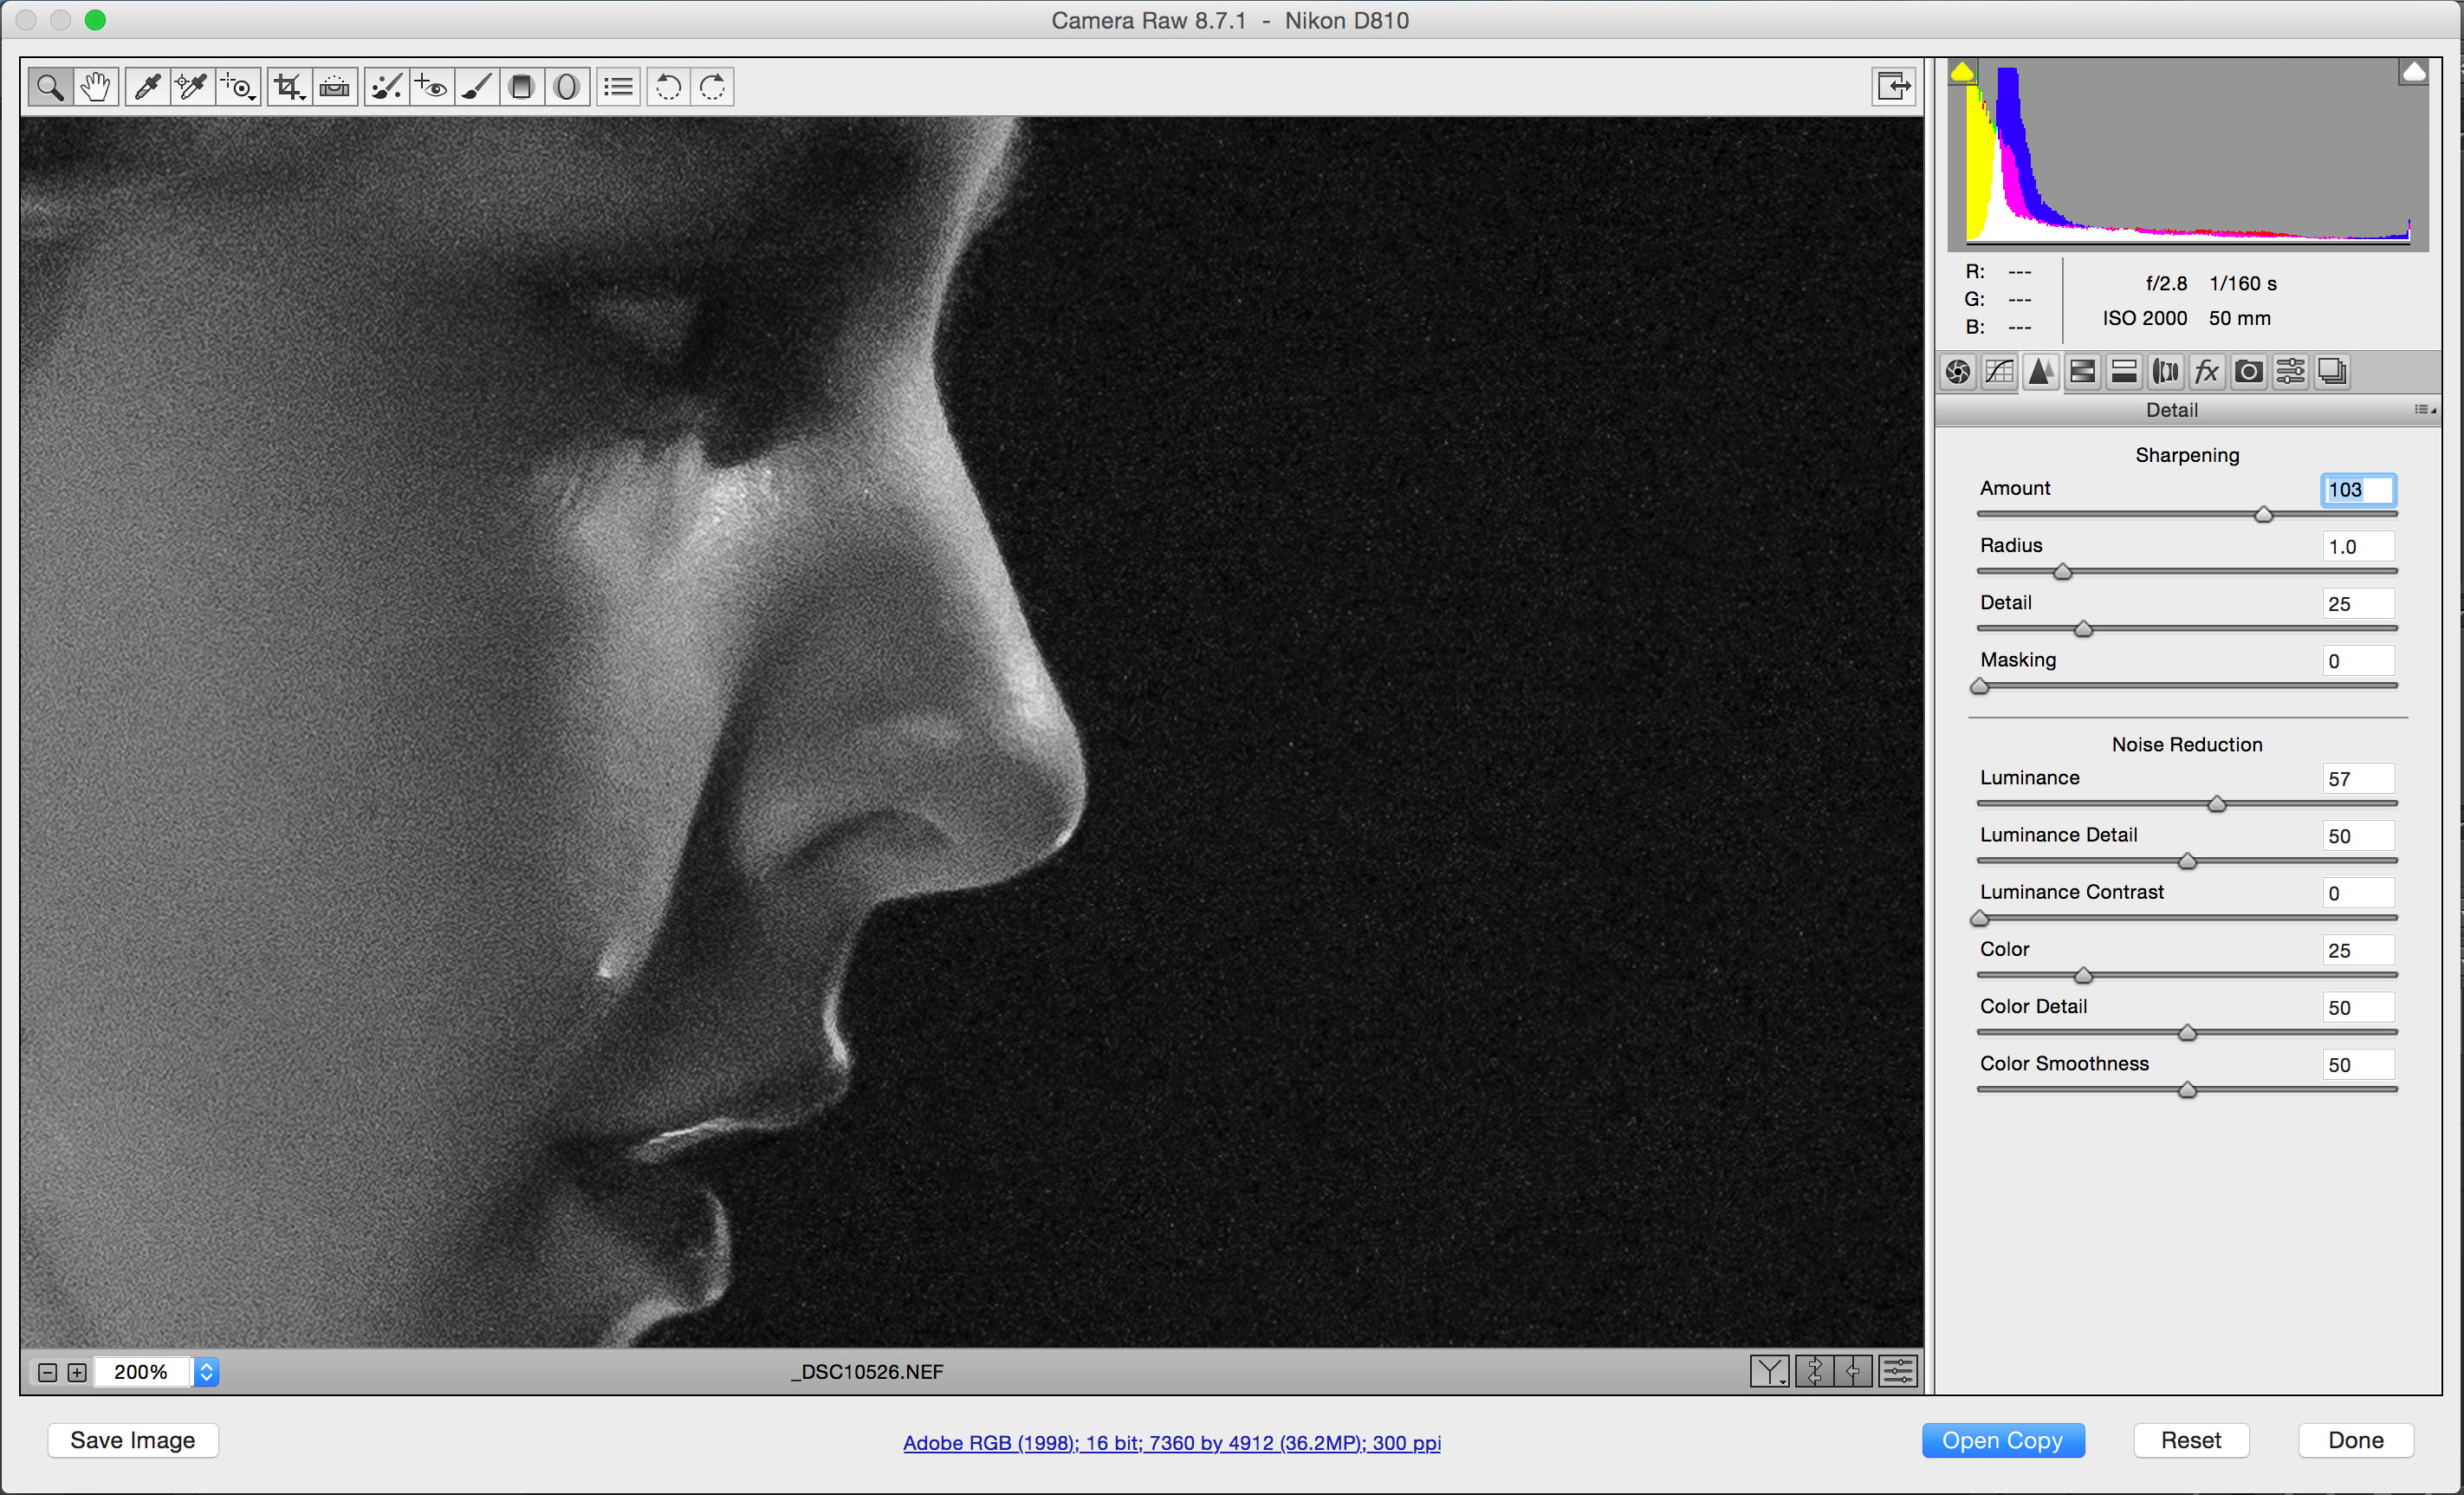 4. This is the step where the magic happens. If you hold down alt and move the masking slider, you can restrict the region that Photoshop will sharpen. When the slider is all the way to the left the screen is white, indicating everything is sharpened. Here I bring up the slider so that we sharpen the eyes, mouth and the tear, but to a lesser degree the shadows and skin. You can experiment a bit with this, too much masking and the details you want to preserve become blurry.
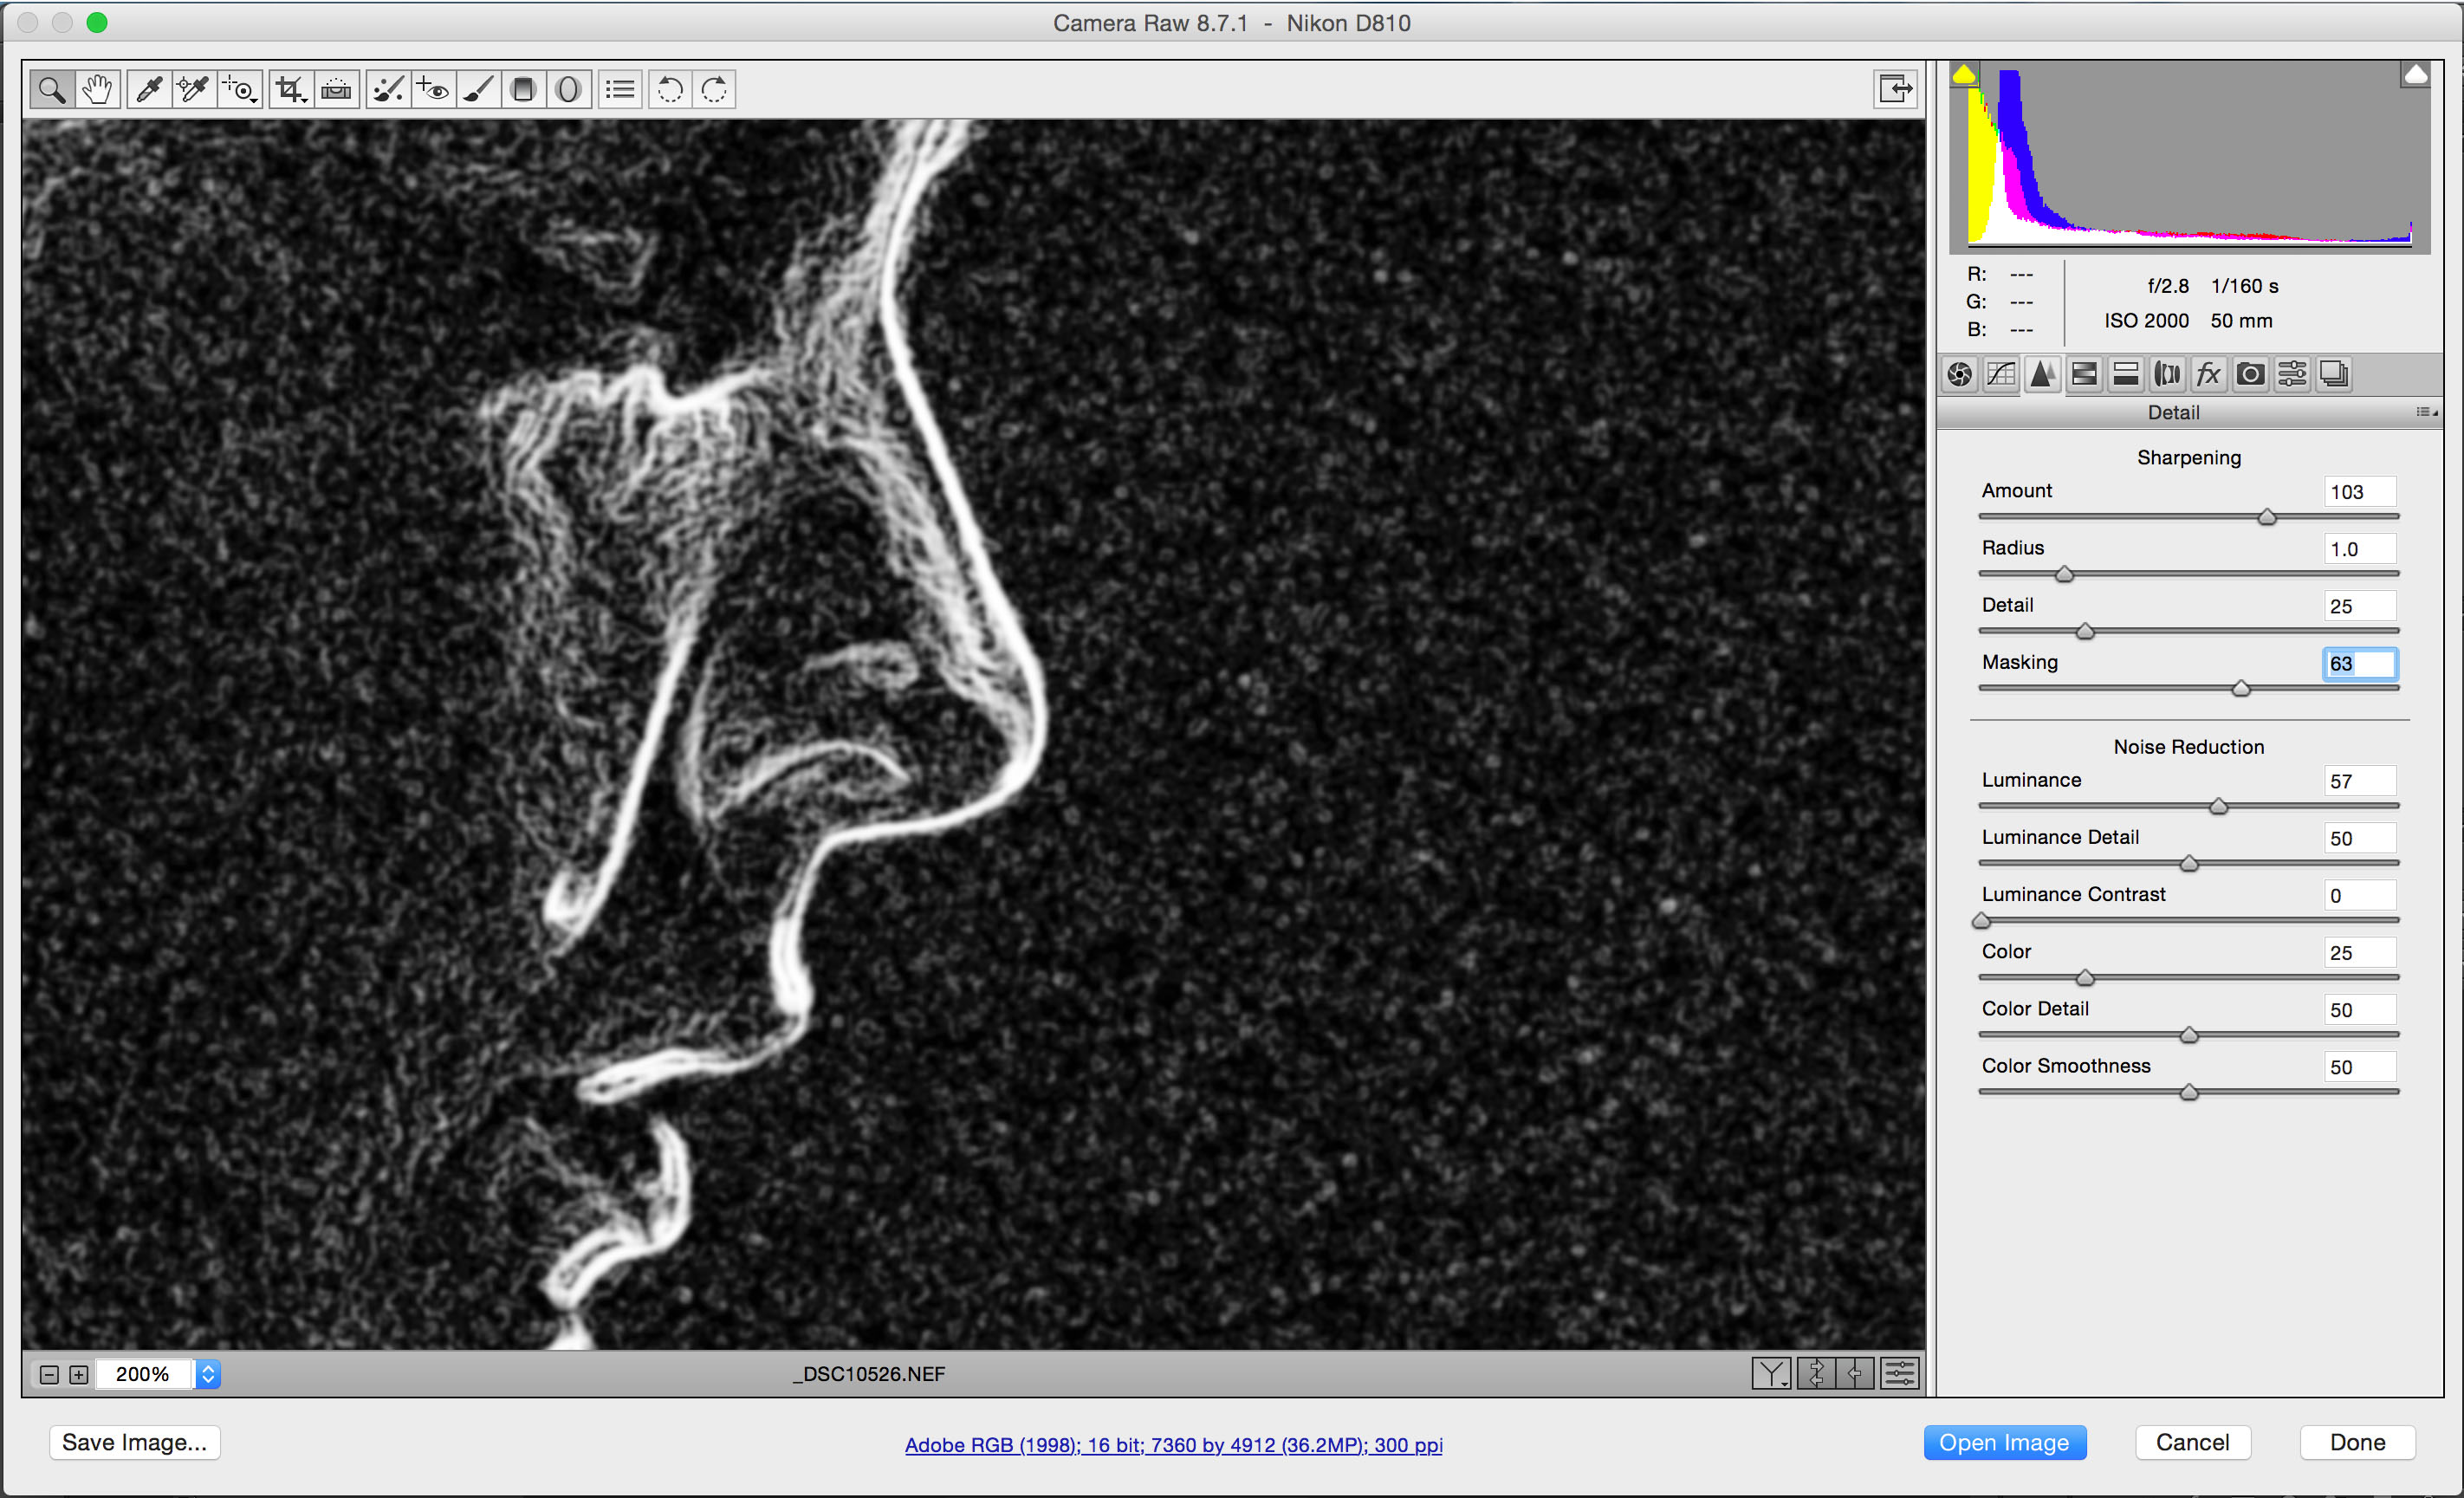
This is the final result. I sometimes also try the luminance detail and contrast sliders. The colour slider can be useful if your shadows have lots of little coloured specks. This file saw a moderate reduction in file size from 9.7MB to 4.6MB. You can do even stronger noise reduction if you want, but I prefer to have a bit of it left. This might actually be a bit too strong for my taste. A bit of sharpening, and possibly some brightening of the region around the tear using the dodge tool (with protect tones checked) and the photo is done. Truth be told, I ended up keeping my old noisy version of this image, since the tear was more visible in the original image.
 Click on the image below to see it in full size. The noise is not as visible in the reduced size.
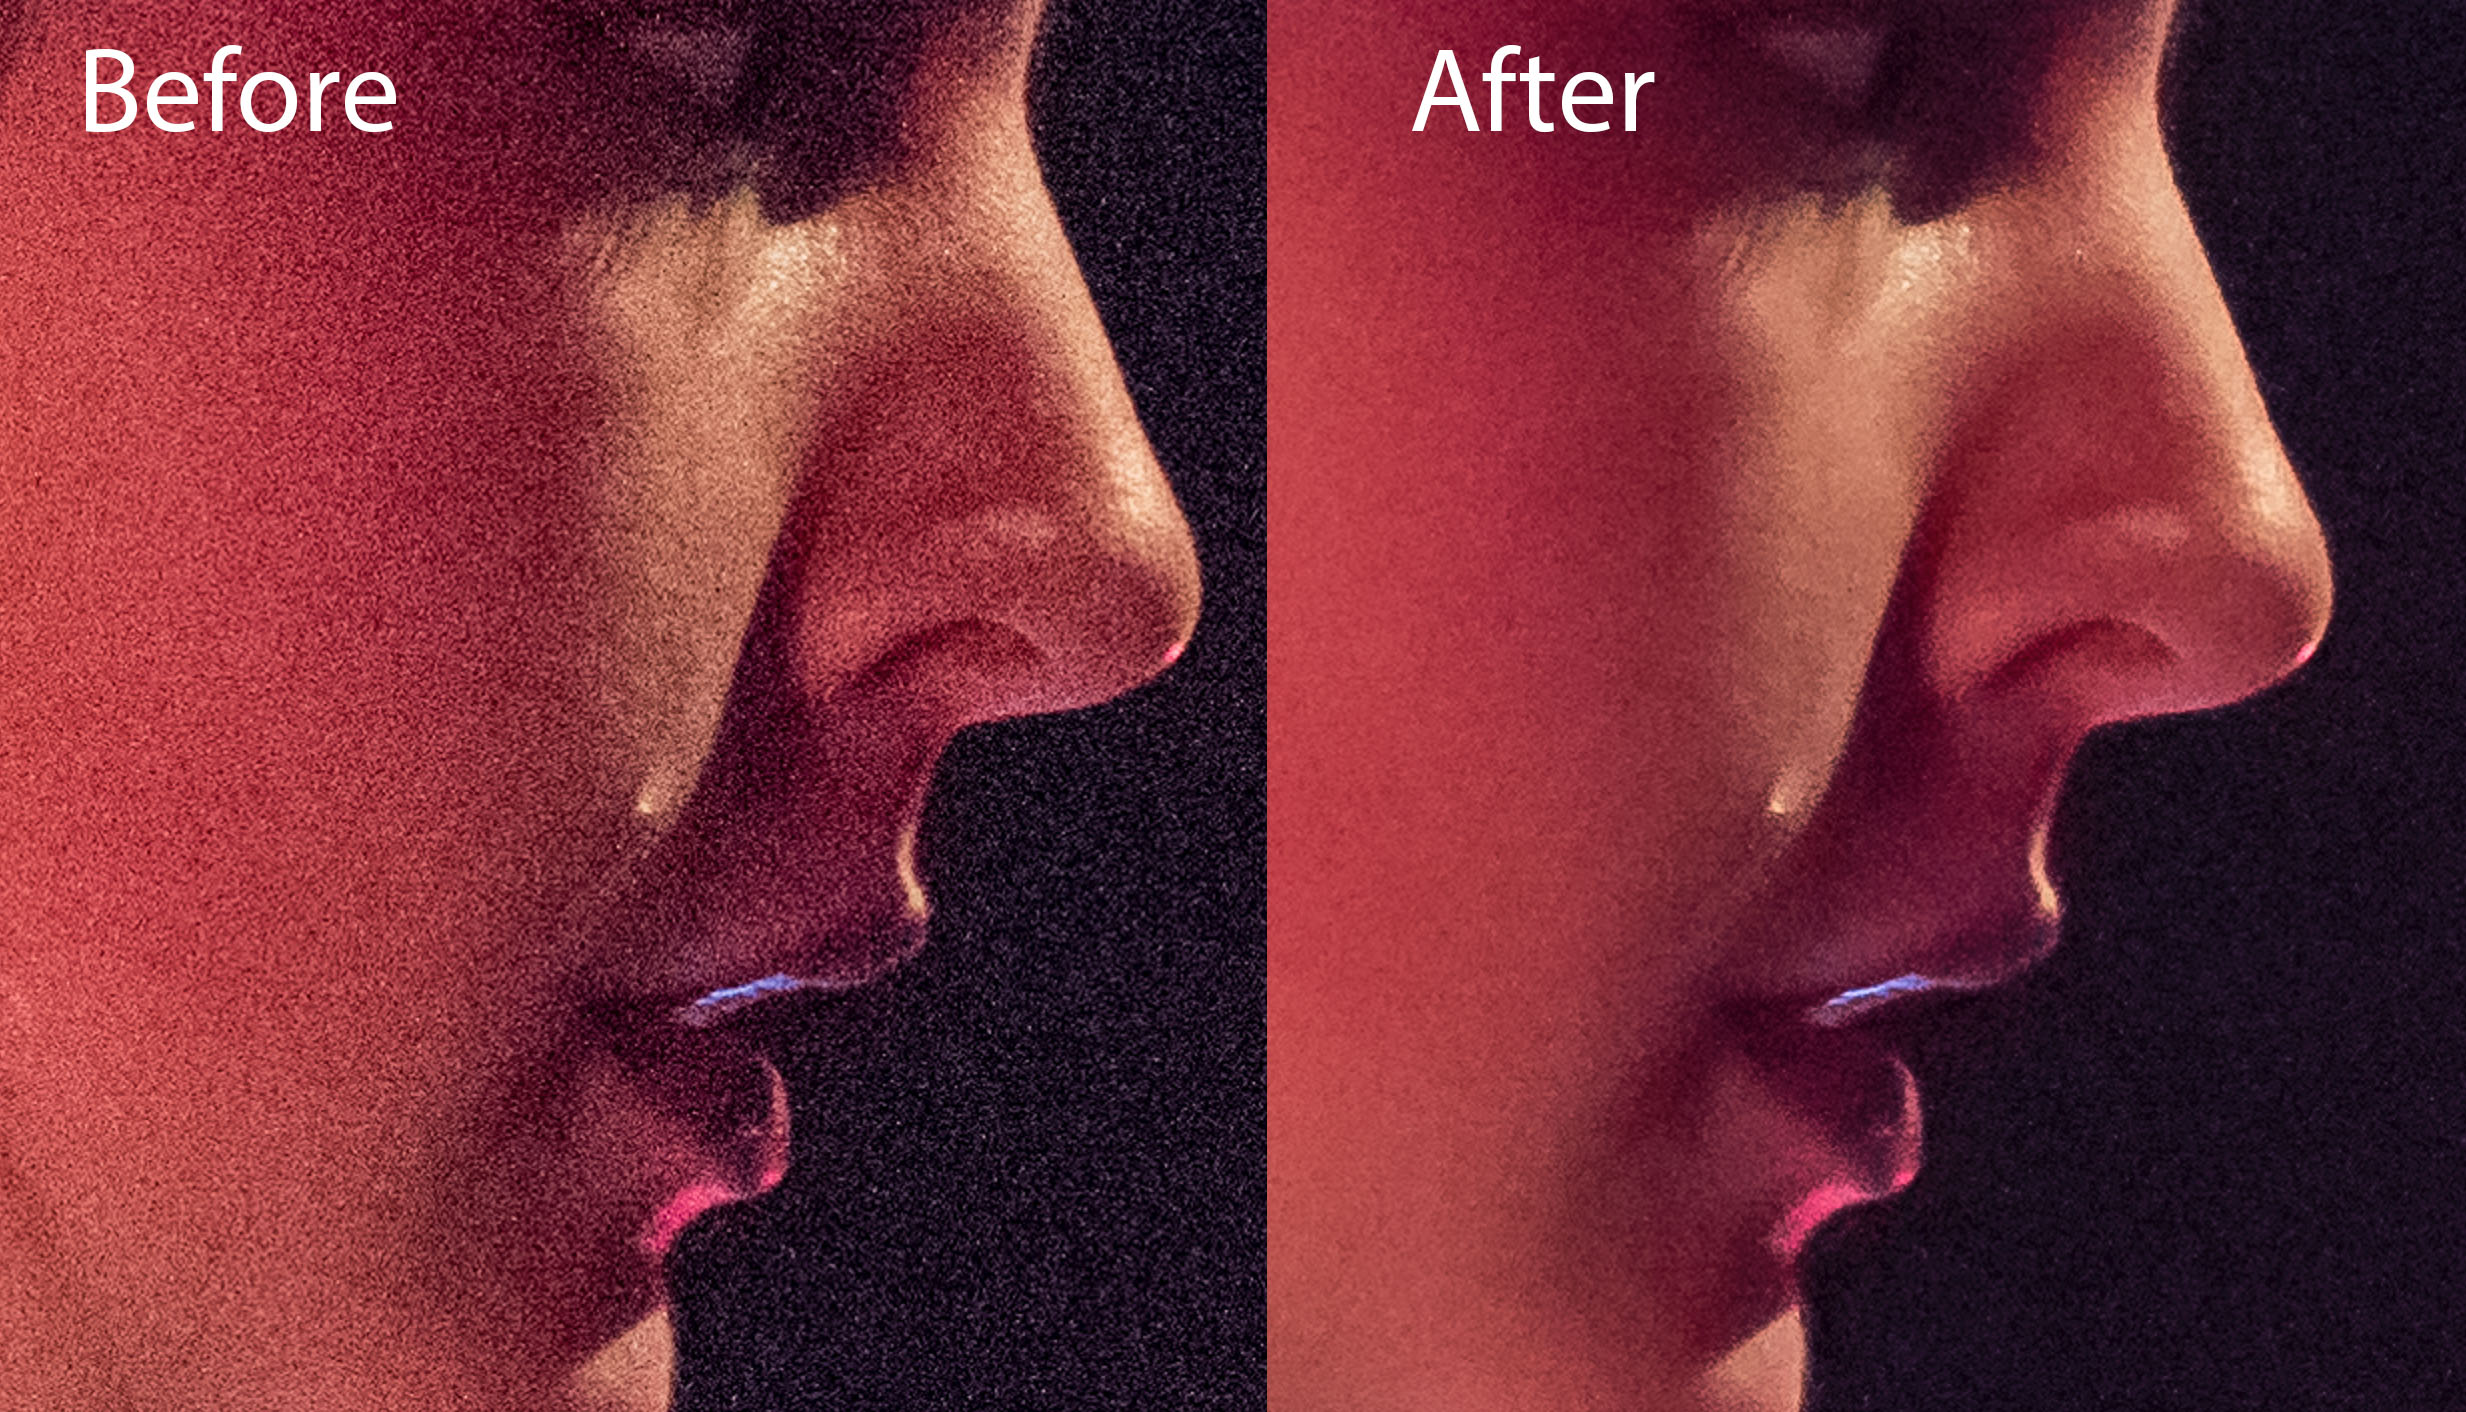
Hopefully this is useful to a few of you. I have now started to incorporate a noise reduction step in all my images where I have pushed the exposure beyond one stop.
Original photo is of Laura Waldren, from the MacBeth dress rehearsal back in November last year.
– Johannes
Be First to Comment