Cambridge University has a very vibrant theatre scene, with the ADC Theatre and the Corpus Playroom being the two main venues, each of them putting on two shows a week during term time. In total there are over a hundred shows each year. Plenty of opportunity for theatre photography. Photographing theatre is a lot of fun, but it provides some challenges for us as photographers. The light is often not all that great, and it can be difficult to get the right moment and framing that captures the essence of the scene. The dress rehearsal, which is the final rehearsal before the premier, usually happens just hours before the show opens, which means once you finish you need to quickly pick the best photos.
In this blog post I am going to talk about how I approach a dress rehearsal, how I photograph it, and end with some words about my choice of camera and lens. If you are new to theatre photography, then hopefully there is some useful information here for you.
Find out what will happen in the play
I prefer to arrive a bit before the dress rehearsal is scheduled, so that I can talk to the actors and directors and ask them about the play. What are their favourite moments from the play that I should look out for? Are there any sudden things that will happen that you should be prepared for, or will there always be a buildup to the action scenes so that you can anticipate it and have time to frame the shots. In a dress rehearsal they usually just run through from start to finish without stops, so you only get one chance. You need to be prepared for when the pivotal moments in the important scenes happen.
If they have well choreographed fight scenes then they will normally block these before the dress rehearsal starts. It is a chance for you to get a preview of what will happen, and figure out where you should stand for later.
Given that the thespians are usually a bit late, and working under a tight time schedule, it is often not possible to stage any scenes after the dress rehearsal as the actors needs to eat and prepare for the premier. However, if you are early you might be able to get a few shots before the dress rehearsal starts. You can usually also get some nice behind the scenes photos if you are a bit early, most actors love to have fun infront of a camera.

Check where you can photograph from
You should also have a chat with the stage manager before the dress rehearsal starts. For the ADC Theatre and other venues you will most likely shoot from the front of the stage as the set is usually built to look the best from that direction. However there might be scenes when you want to get in closer, and having the option to go up on stage to shoot can then make for a better photo, especially if you have a prime lens and are unable to zoom in. Normally this is not allowed, but if you chat with the stage manager and the director before the rehearsal starts they might say it is ok to be on stage for some of the scenes.
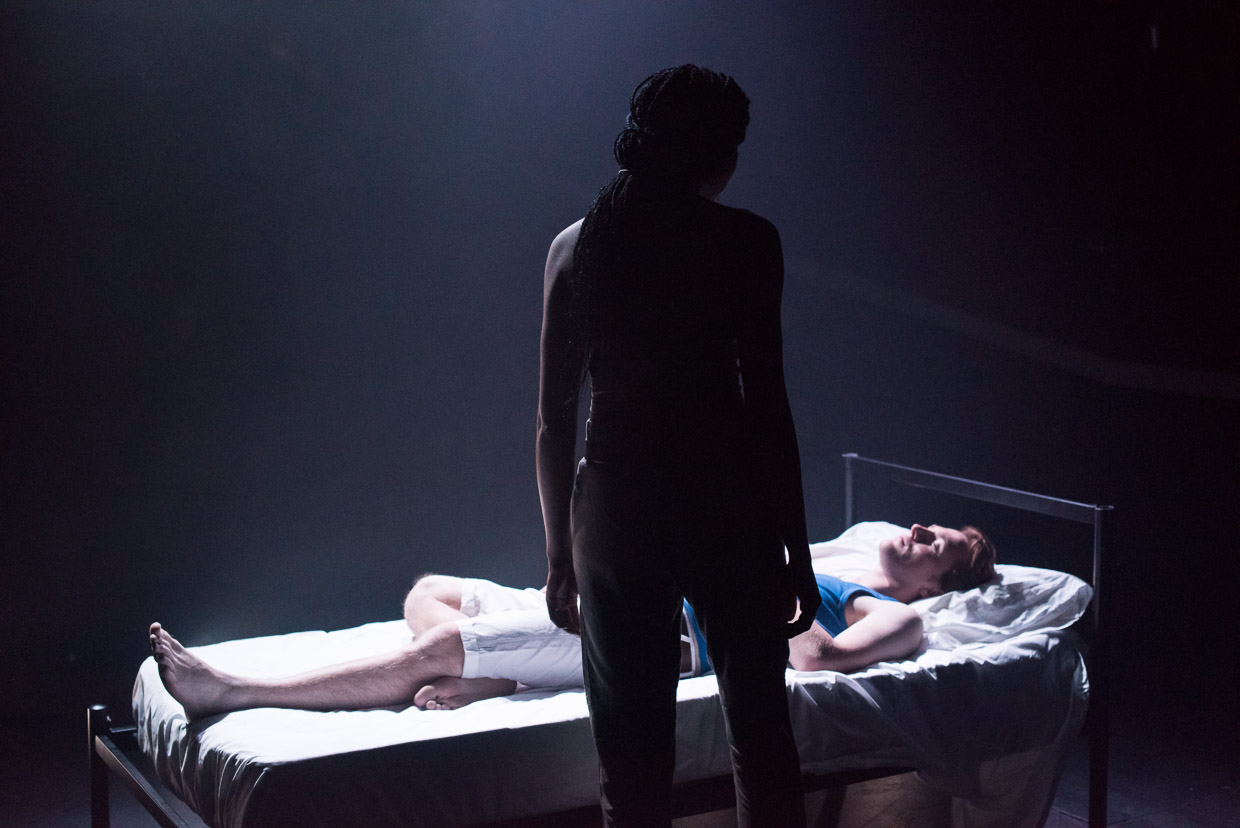
Corpus Playroom is a bit special, because here the audience sits on two sides of the stage, which means the set is built to be viewed from a wider range of angles. Also the stage is not raised, so the barrier between you and the actors is gone. To get dynamic photos you need to be on your feet, and prepared to move around to frame your shots. Do not make the mistake of shooting all the photos from the audience view, experiment by going behind the actors. This will usually backlight them and make for more dramatic shots with lots of shadows.
Thoughts on framing
Framing can be difficult, especially if they move around a lot on stage. If two actors on stage are overlapping in my photo then I generally try and move sideways to separate the two. Be aware of what is behind the actors. Sometimes it helps to move to change the background.
A photo with a black background and dramatic light looks great, but if all photos are like that it soon looks boring, so try and include a bit of the scenery around the actors in your photos, and vary your framing between shots. Get in close, move further back. Shoot from the side of the stage, shoot from the front of the stage, shoot low with the camera just next to the floor of the stage. Experiment.
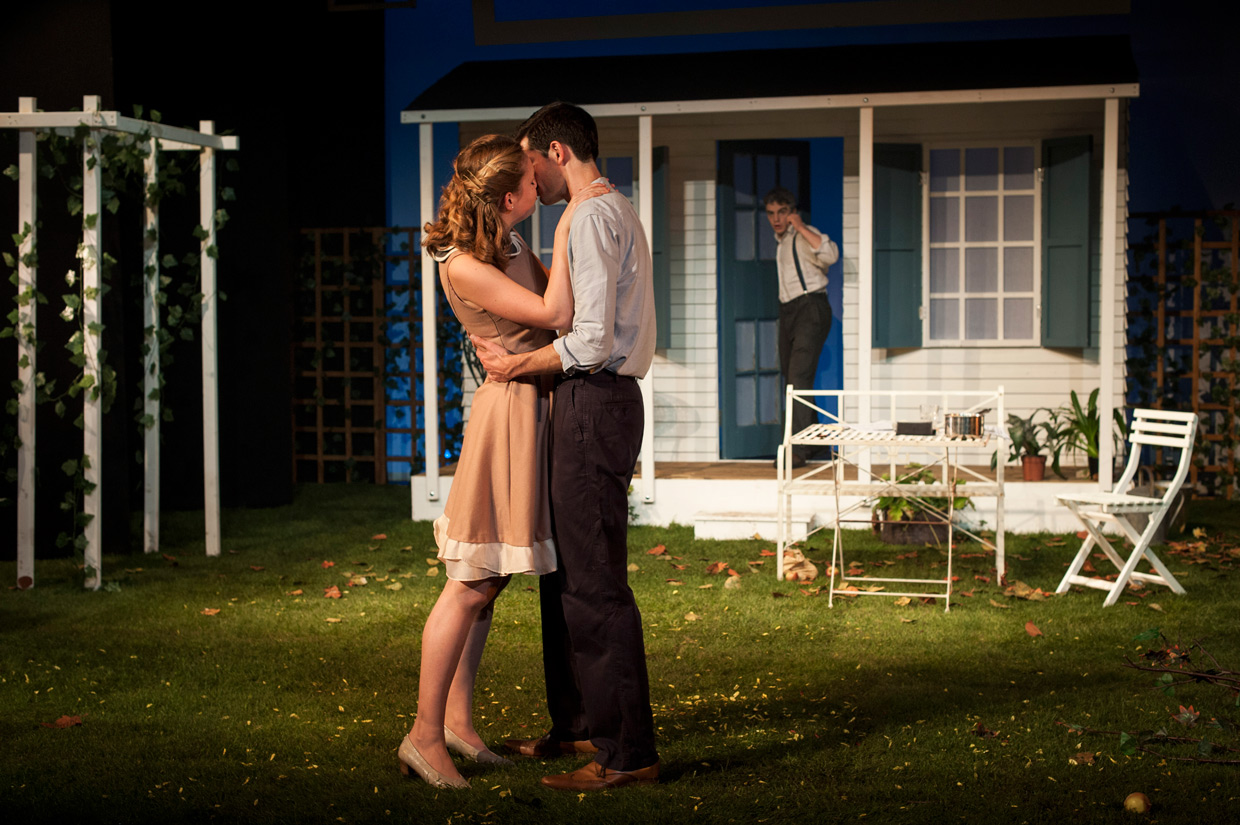
One setup that I like is to have one actor in the foreground, either turned towards the camera or slightly sideways, and then something happening in the background that he or she is reacting to. An example of this is the cover photo for this blog post where Emma is in the foreground.
Another example are two actors arguing, which is a pretty common scenario. To make it dynamic, they usually take turns pacing away from each other while talking. What I then try and do is anticipate where the actor walking away is going to move towards, and then stand there so that he or she will walk towards me. This works surprisingly often. Other times they just turn away, without walking, and if you are prepared standing on the side they turn towards you can get great shots with both the actors looking in your direction.
Thoughts on Timing
You need to be ready for sudden gestures, which might only last a split second, but they can really help you tell the story. It can be a look of disapproval, a sudden glance, hands going up in the air. Do not only focus on the main actors, be aware of what is going on around them and try to incorporate that also.
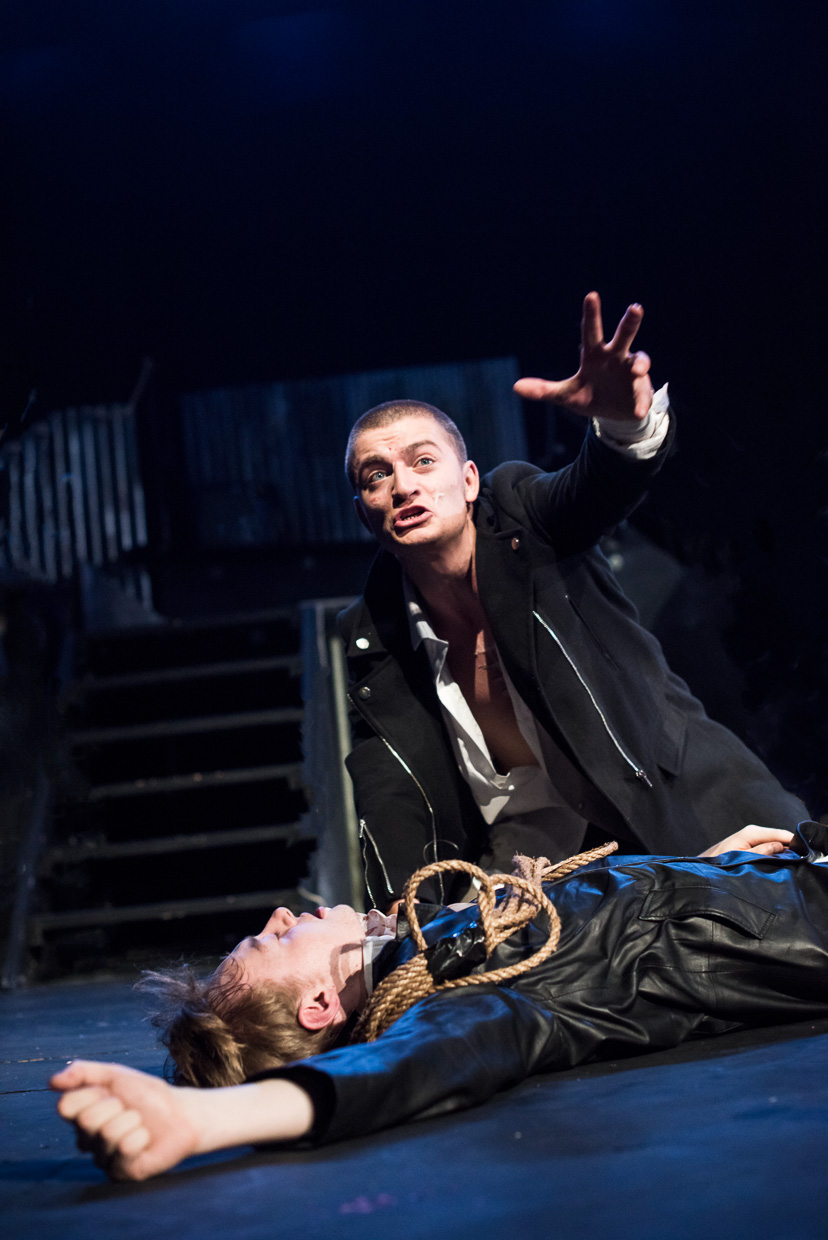
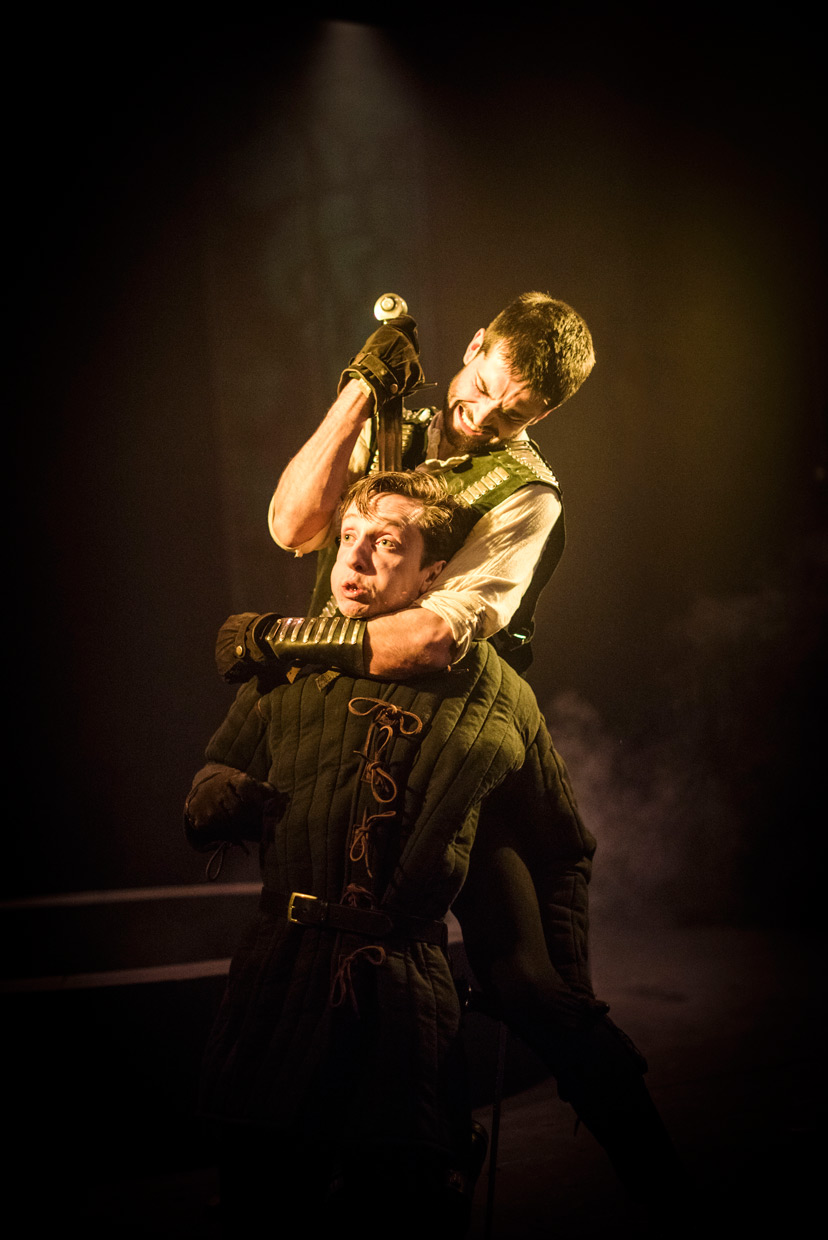
If there is going to be a fight scene, you can try and capture the buildup, are there any onlookers and how are they reacting. Then you want to make sure you get the actual punches or kicks with the victim reeling or flying from the onslaught. Finally the outcome, here a low angle with the victims face close to the camera and the aggressor towering over could be a great shot.
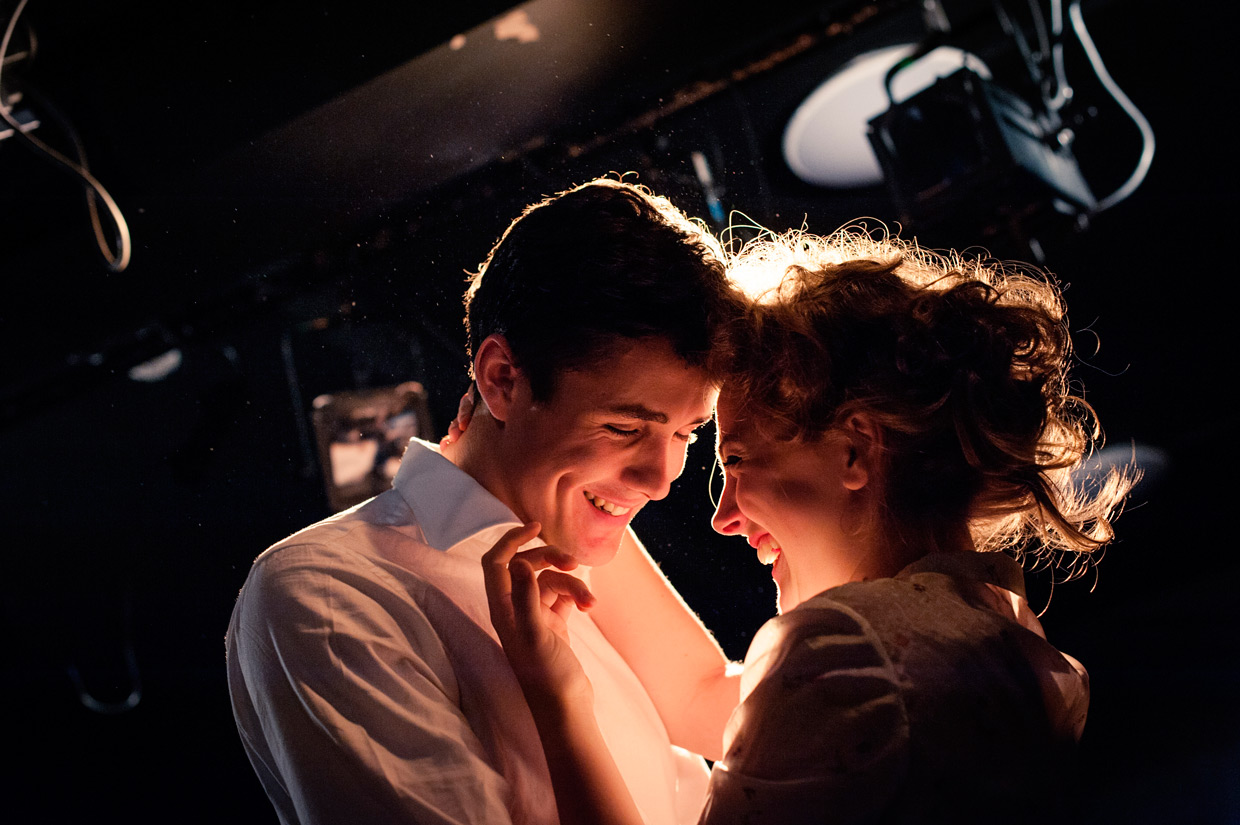
Another example could be a kissing scene. Often it is more interesting to get the shot just before they actors lock lips. You can get some great shots with the light coming in from behind. A good theatre photo captures the feeling that the actors are projecting and tell a story.
In the end you are going to throw away a lot of photos, so just keep clicking, it is better to have too many than too few.
Camera Equipment
Because you are going to photograph a performance, using flashes are usually frowned upon, instead you have to work with the stage light that the lighting designer has provided. Some plays and shows have really bright lights, but more often you have to photograph dimly lit scenes. Luckily for us modern cameras are getting better with each new model that is released. Generally speaking a full frame body is better than a crop sensor body, since the pixels will be larger, each receiving more light. Another big difference between entry level cameras and higher end cameras is how accessible the controls are. Modern cameras of all levels are able to take great photos, only the latter might allow you more quickly adapt to a new situation when the light changes because of more dedicated controls.
If you have an entry-level DSLR then odds are you will be using the kit lens that came with the camera. Those are typically something like 18-55mm. If that is what you have, then it is important to note that your maximal aperture changes with how much you zoom. Fully zoomed out at 18mm you have f/3.5 and when you zoom in this reduces to f/5.6. This means that zoomed out to 18mm your camera receives 2.5 times more light. So if you are in a pinch with too long shutter time, and too high ISO, then zooming out might help. Higher end zoom lenses like 24-70mm f/2.8 have a fixed maximal aperture, but they are also more expensive.
Another option is to use prime lenses. These are lenses that only have one focal length, meaning you cannot zoom with them. This means that the optics can be made simpler, and often of higher quality, than zoom lenses. Personally I use a 50mm f/1.4 lens which lets in a lot of light and give a very sharp image. A 50 mm on a full-frame camera, corresponds to 35mm on a crop-sensor body. The downside to using a prime lens is that you do not have the same flexibility with your framing, instead you have to move around a lot, but for my style of photography this works fine. Most major camera brands now offer cheap prime lenses. As a bonus you will get the ability to create nice blurry backgrounds in your photos, should you so desire.
Finally, make sure your camera memory card is empty and your battery is charged. Having spare memory cards and batteries is often a good idea. Also set your camera to shoot in RAW file format, but more about that and other camera settings further down.
Back button Auto-Focus
I have setup my camera to use back-button autofocus. This means that I use the normal shutter button to take the photo, but I use my thumb on the AF-ON button to focus. That way I can prefocus the camera in a scene on one of the actors, recompose, and then be ready for any sudden changes. If you do change your camera settings, make sure you practice a bit before hand, so you know how it works.
Shoot in RAW
I mostly shoot in manual mode, typically around 1/150s, f/4.5 and ISO 1200, but this might vary depending on the scene. The camera is set to save the photos in RAW format, which means I will need to post process them afterwards which will take time, but it also means I have more leeway if I accidentally mess up my exposure or white balance. The latter can be really tricky to get right and then it is good to be able to correct it afterwards.
Depth of Field
You might be tempted to photograph everything at f/1.4 if you have a nice prime lens, but the reason I do not usually do that for dress rehearsals is that your depth of field is really shallow. I tend to take a lot of photos at relatively close distance and if you use a depth of field calculator you can find out that with 50mm f/1.4 at a distance of 3 meters, your depth of field is only 30 cm. At one meter’s distance the depth of field is only 3 centimeters. If you shoot from a larger distance, or if your subjects are at the same distance from the camera, then you might get away with using a large aperture. The depth of field increases the further you are from your subject. Instead as I mentioned above, I tend to shoot around f/4 or so.
Manual Mode, Aperture or Shutter Priority
I use manual mode when I photograph, but if there are a lot of quick changes in light stages then I might turn on Auto ISO with the highlight priority mode. This means that the camera exposes for the brightest highlights, unfortunately not every camera has this setting. Most often I use manual ISO, and then dial between different ISO settings depending on how the light changes. It is a good idea to check the histogram on your photos every now and then.
If you are starting out then you might use aperture priority or shutter priority mode. With aperture priority you set the aperture, and ask the camera to figure out the shutter time and ISO. With shutter priority you set the shutter time and let the camera figure out the aperture and ISO. Aperture is important to decide the depth of field so many people use aperture priority mode, however if you choose this, pay attention to the shutter time the camera chooses. You can often hear on the shutter sound if someone has set their shutter to too slow, which will give you a lot of motion blur. When you start getting to around 1/100s or slower it is generally good to increase the ISO and sacrifice a bit of image quality for shutter speed. If you decide to use aperture or shutter priority, then look up how you do exposure compensation on your camera. If the camera generally exposes too dark then you can compensate using the exposure compensation to make the shot brighter, and vice versa.
After the dress rehearsal
The dress rehearsals in Cambridge are usually done on the same day as the show premiers. For example the ADC Theatre typically does their dress rehearsal for the main show on Tuesdays around lunch time, which means you only have a few hours before it opens. To quickly cull the photos, and decide which ones to edit I use Lightroom. First I will go through all the photos, marking the acceptable ones with one star. This removes photo that are blurry, have terrible expressions etc. I will then sort through all the one star photos, and mark the good ones with two stars, then go through all the two stars and mark the best ones with three stars. Each time the bar for a pass is raised. This will be repeated up to five stars if needed. Out of about 800-900 photos typically 5-10% will remain and be edited. I prefer to edit all my photos in Photoshop, which with a bit of practice is quite quick when you use a Wacom tablet. Not all photos that I open in Photoshop will be edited, some might be discarded at this stage as well. Out of the edited photos, about half or less will eventually make it up on the blog.
It is great to give them a couple of photos edited right away as a teaser for the premier, and then the big batch of photos I usually try and have done within a day or so, in time for the theatre reviews in Varsity and TCS. Do not forget to send an email to the theatre editors to let them know there are some photos available of the latest play to hit the ADC or Corpus.
If you want to see more of my theatre photos, check the theatre category on the blog.
Good luck and have fun!
— Johannes
I shot my first theatre show yesterday and some things went wrong, so I was searching for tips of how to be better at it and found your page. Thanks for the in-depth post!
A really excellent piece, thank you. I haven’t used RAW before, partly as I don’t have Lightroom or Photoshop but I’ll be trying it at the first Dress rehearsal tonight. I’m gratified to hear about the number of shots you initially shoot as sometimes it’s tempting to believe you are a rubbish photographer, whereas I know differently! Alsi I like th idea of backstage being B&W. I always do some shots in B&W but it’s a bit random and tends to mainly be done to save a rubbish colour shot. Well done. Colin in Sussex England.