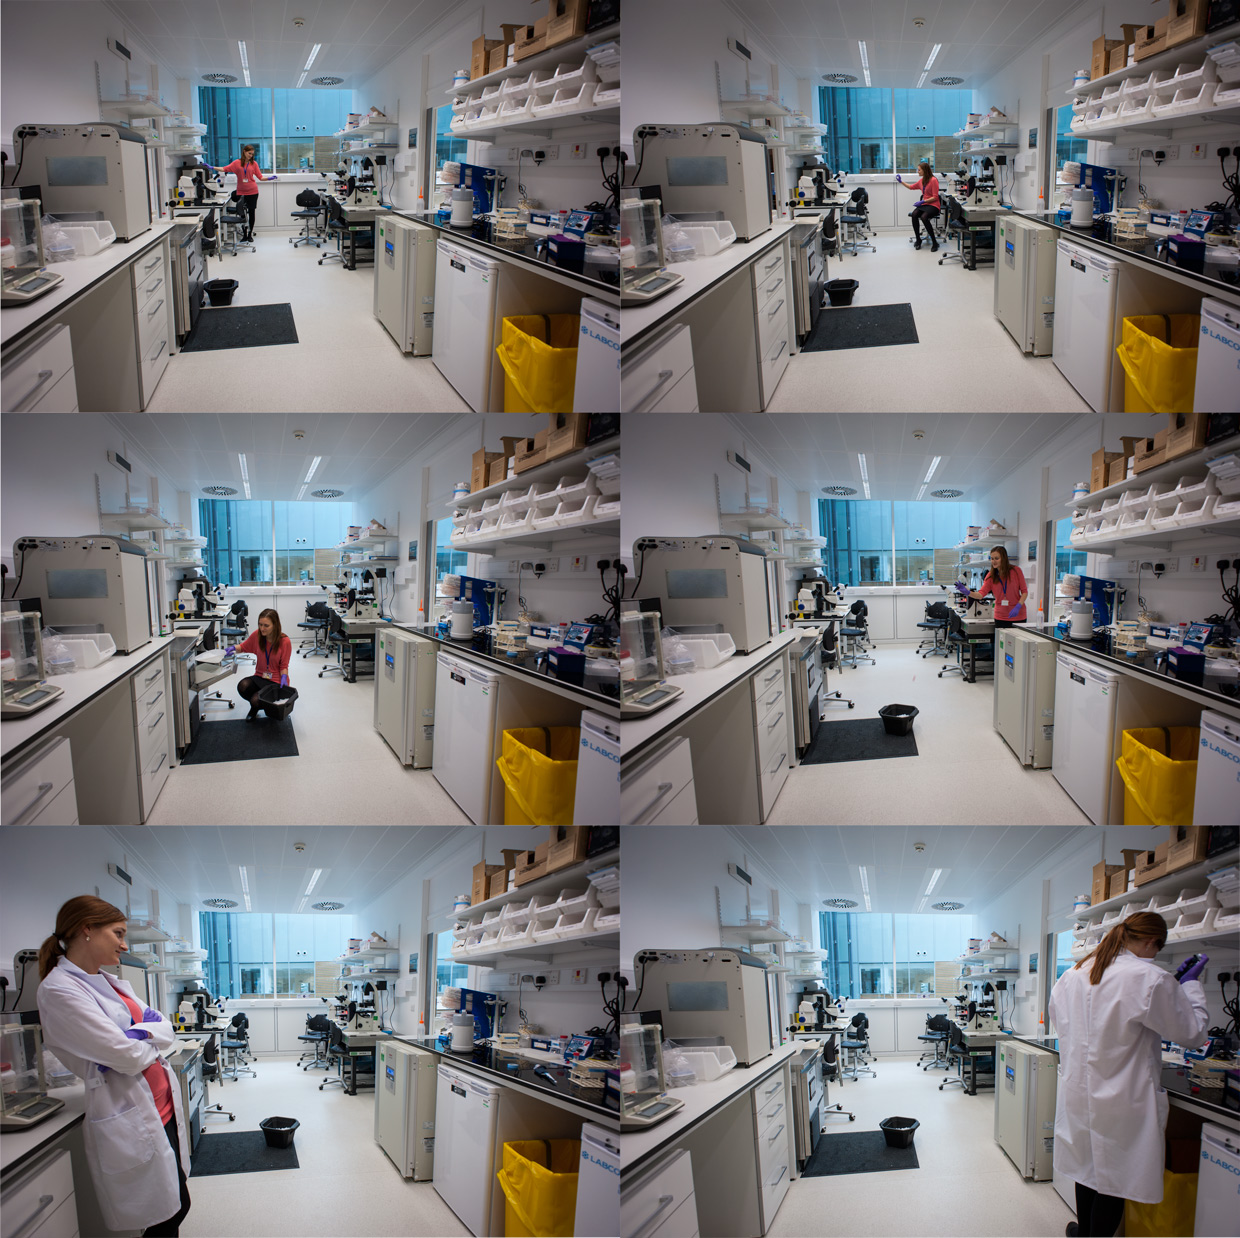
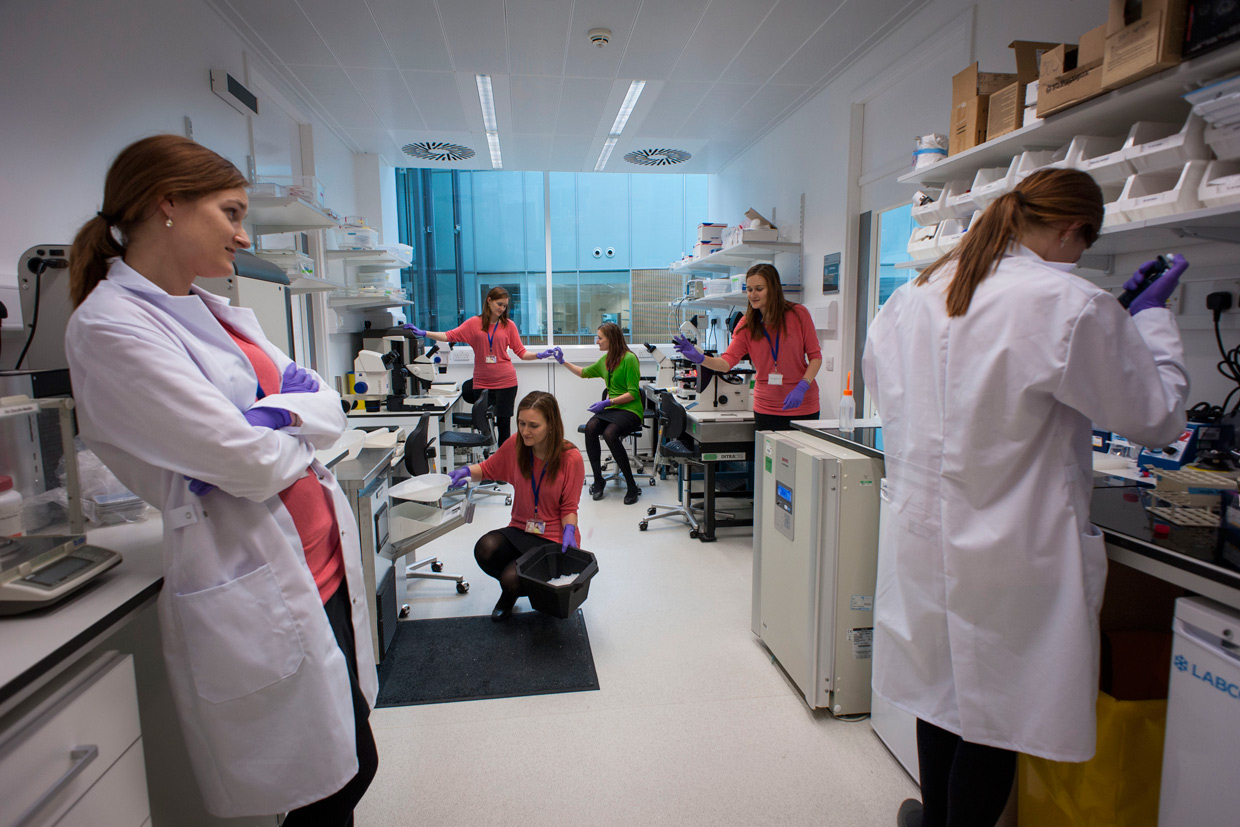
Some days there is so much to do that you wish you could clone yourself. We might not quite be able to do that yet, besides if we did manage that we’d have the problem of raising and training the clones, but what we can do is clone people using Photoshop. I went and visited my friend Zuzana Holubcová in her lab this Sunday to take a few photos and we decided to try just such a photo. To do this, all you need is a tripod and a friend, well you don’t really need the friend if you set your camera on a self-timer, but it is more fun that way. The idea is pretty straightforward, you fix the camera view using your tripod, then take multiple photos of your friend in different (preferably non-overlapping) positions and use Photoshop to combine the different photographs.
To get as much as possible in the picture we used a 20 mm lens. Just to be on the safe side I used a depth of field calculator to make sure that the aperture was small enough to give us focus within the entire room. I’ve been burned before by believing something was sharp from looking at the little preview on the back of the camera, and then seeing it slightly blurry on the big screen. At f/5.6 on this lens and with the focus at about 2 metres distance our depth of field will be from 1 to 18 metres. Opening to f/4 would give 1 to 5 metres, which was cutting it a bit too close. Better play it safe. To make sure we get consistent exposure it is a good idea to shoot in manual. Look at the exposure meter, take a few test shots and verify that the histogram looks good, I used 1/100s of a second to minimise the risk of motion blur and then finally increased the ISO to 500 to get a decent exposure. I took extra care here getting things right so we could concentrate on the creative things.
To make the photo more dynamic you can try and get the clones to interact with each other. The easiest setup is to just have them look at each other, it gets more complicated if you try and have them interact physically such as shaking hands or passing something to each other. The key here is to get some kind of point of reference. For the two clones that are passing a Petri dish between them we used me as a reference point, in between the shots I would walk over and hold the dish while Zuzana switched position. In the end we had to discard several shots because of the overlap, clones in the background would be covered by clones in the foreground.

Five identical people in one shot could be fun, but in my mind mixing things up is better. You could try changing the appearance of your friend in between shots. Perhaps ask them to put on a lab coat, or change sweaters or hairstyles. If you do not have a huge wardrobe at your disposal, then another quick thing is to just change the colour of a top which can be quite effective in breaking the monotonicity.
Once you get home it is time to do your Photoshop magic. The first thing you want to do is open up all photos and then copy them all into one image. Once you have them in different layers you can start creating the clones. The first thing you want to do is make sure that your photos are all perfectly aligned. Even though you shot it on a tripod, things could have moved slightly. Luckily Photoshop has a good function to help you. Select all your layers, then go to the Edit menu, and Auto-Align Layers. The next step is to create a layer mask for all your different layers. This will take a bit of work. First start by turning off all layers but the bottom two (click on the eye next to the layer to hide it).
There are a few different techniques that you can use to create a new layer mask for the second layer. If you go to Layer then Layer Mask, and choose Reveal All you will create a white layer mask. White means that the layer is shown. Now you can paint with black to hide part of the layer. What I find easiest is to paint over the person with black, until he or she is completely invisible, then invert the layer (⌘I on a Mac) to make the person visible, and everything else invisible. Be careful not to get any sharp transitions between the images. Use your brush at less than 100% flow to create smooth transitions, and make sure you include the shadows of the person.
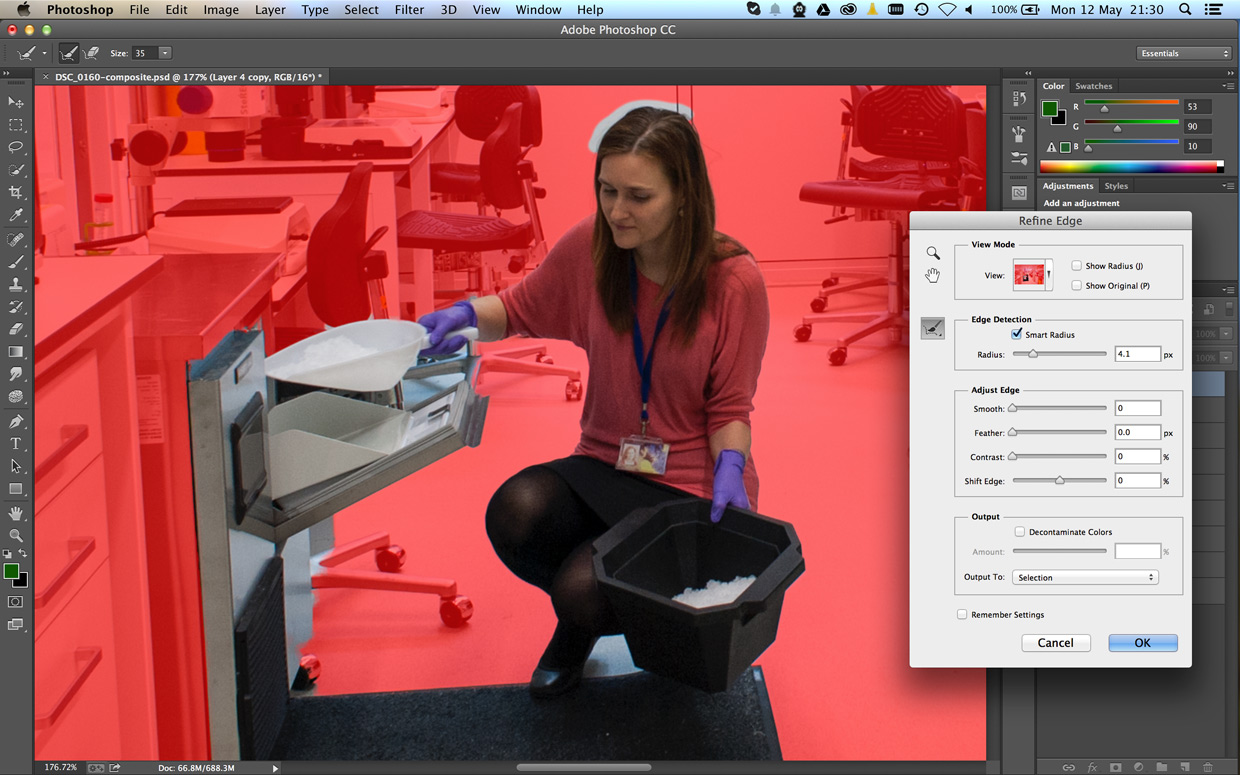
If you need more precision because two clones are close to each other or even overlapping then you could try to use the magic wand too to select the person in the upper image. To get the selection better, click on the Refine Edges button. In the dialogue box you can turn on Smart Radius, and pull up the lever somewhat to get Photoshop to optimise the selection. You can also paint in with the brush in areas which are problematic, like hair. Play around with it. Once you are done click ok, then go to the layer menu and select Layer, Layer Mask, Reveal Selection. You might need to further refine the mask using the brush, but this should give you a good starting point.

In this manner work your way up through the stack of layers. A good idea could be to sort your layers so that the ones with the people in the background are at the bottom. It will take quite a bit of time to make it look good, but the result is well worth it. Have fun!
– Johannes

Be First to Comment