About two years ago I started shooting in RAW, which forced me to post process. This led to a need to be more selective in which photos I kept. Before I was happy shooting jpegs and using them straight out of the camera which resulted in a big pile of mediocre photos. Recently I started going through my old photos, and selecting the best photos from each year. It is a slow process, but it has given me the opportunity to rework some of my old photos. This changes the photos, and gives them a different look. Since I am still searching for my style, my post processing is a bit erratic, so there is no unifying form. Other than that I feel if you look at each photo individually they get better.
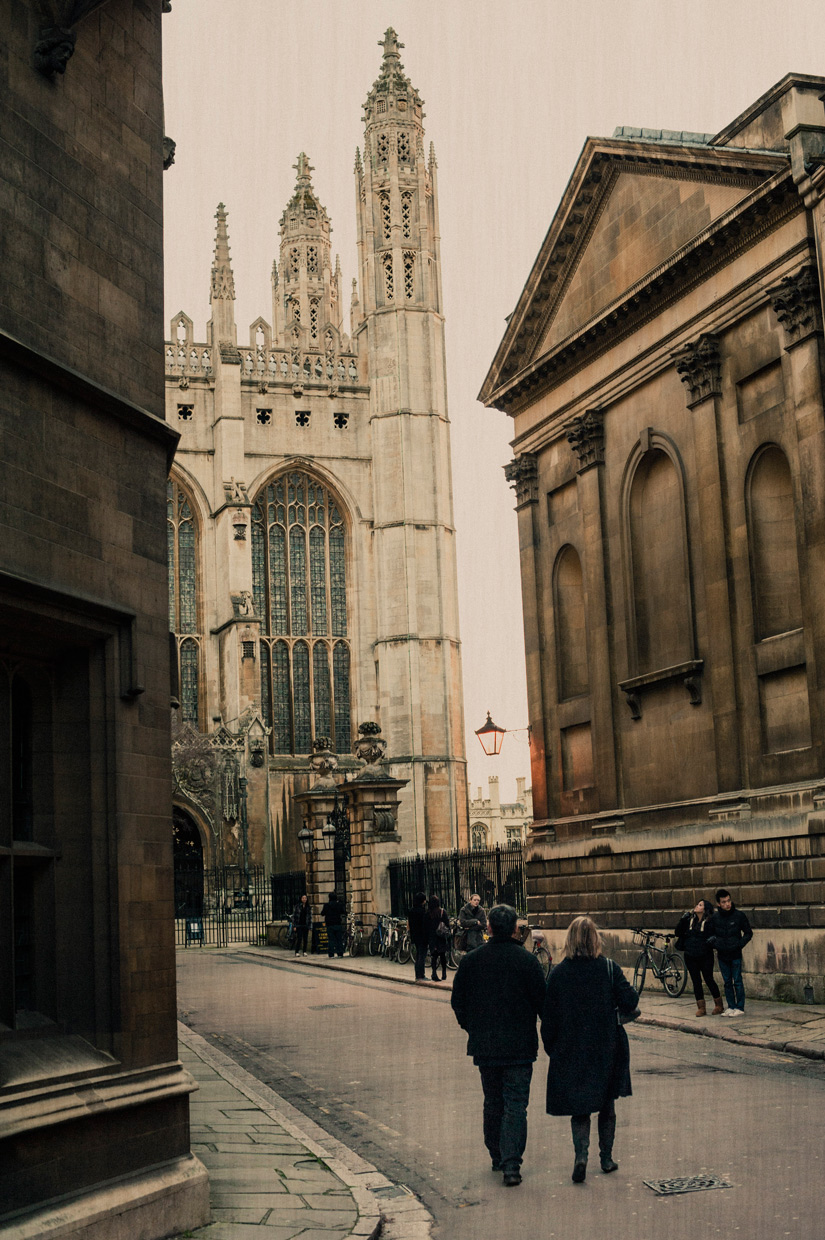
So with that in mind, let’s have a quick look at what I usually do when post processing. My example for this post shows a quick snapshot where I struggled to find the right exposure, while a couple in the foreground were merrily walking away from me. The problem was that the sky was quite bright while the couple were in the shadow, as you can see in the unprocessed RAW image below.
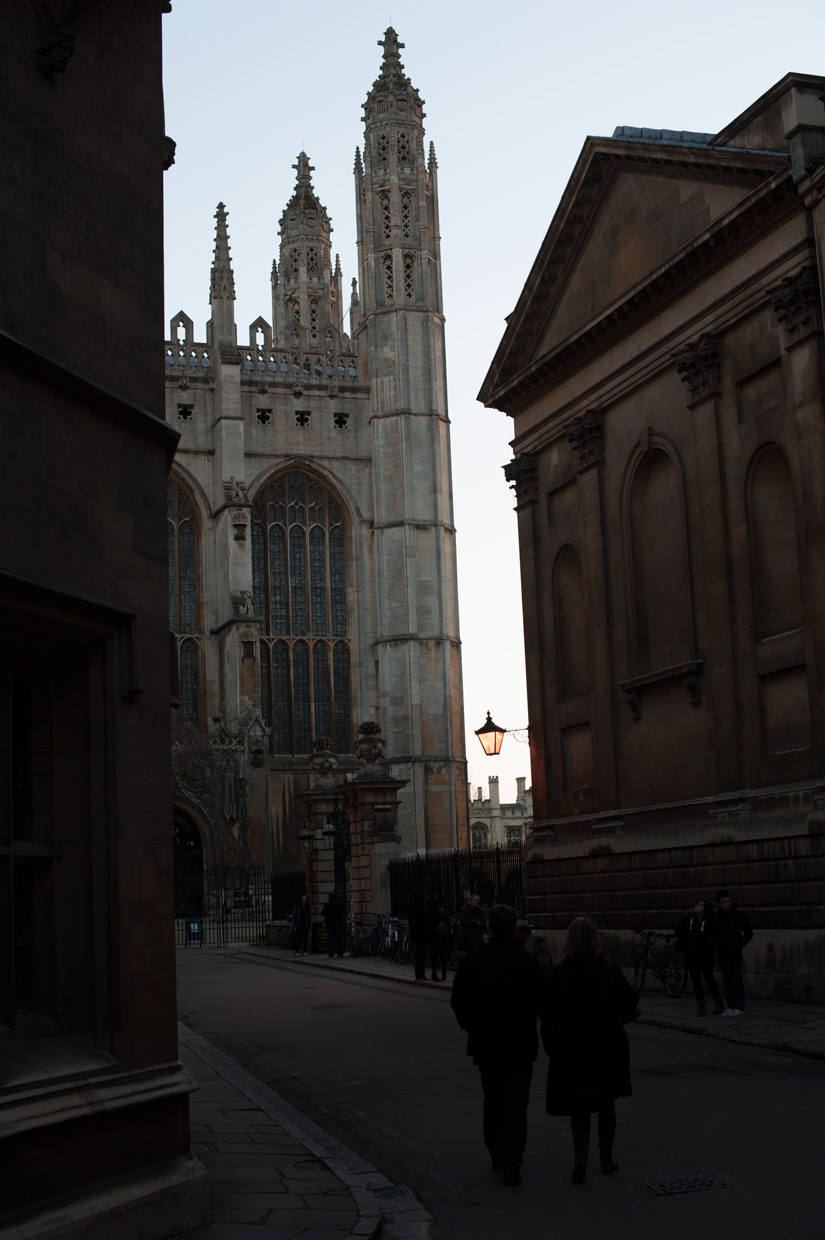
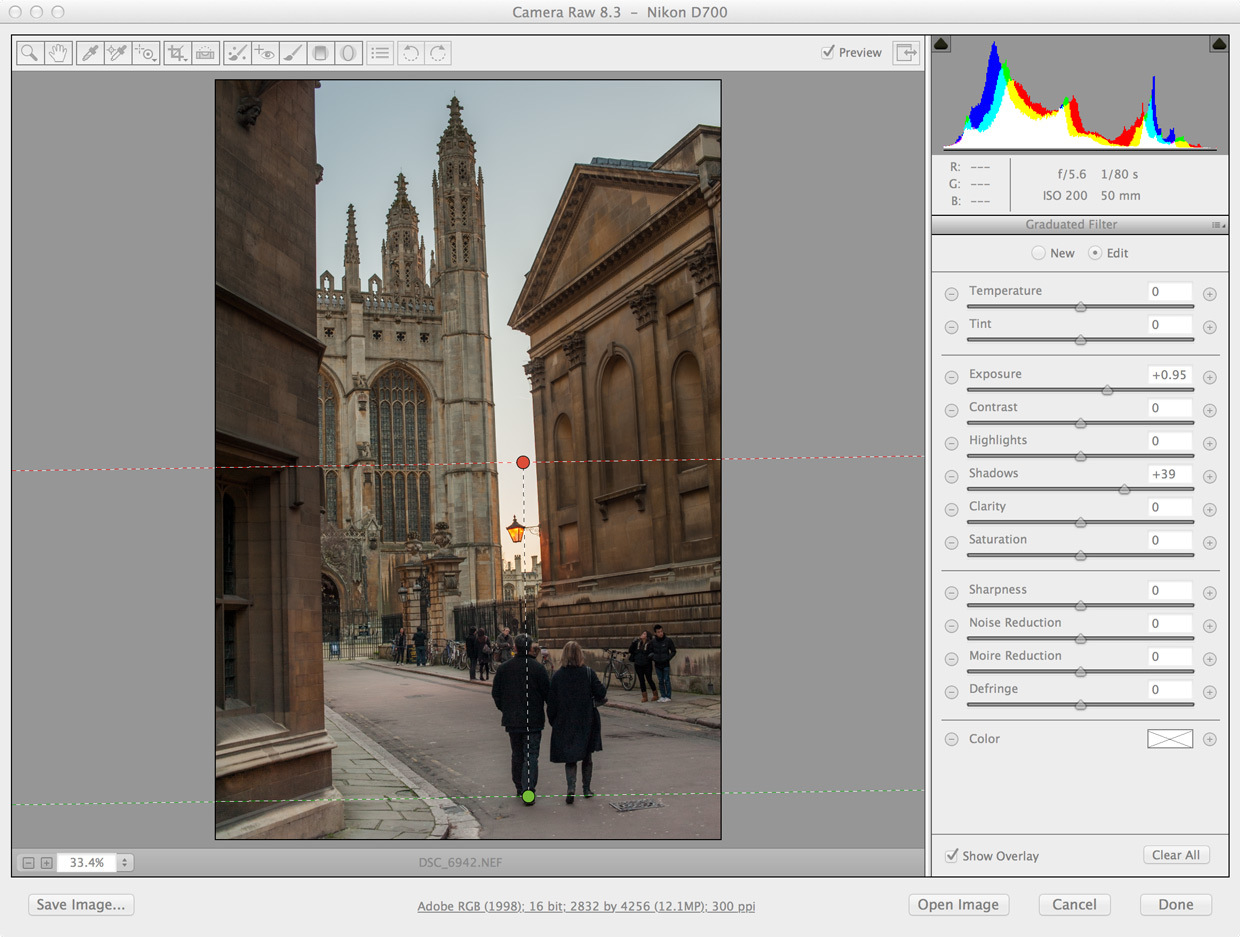
If I increase the exposure the scene comes alive, and you can see the couple walking towards King’s College Chapel. Unfortunately the sky becomes blown out, so we need to do something about it. But before we start with that I would like to just point out two things. First, I have switched from 8 bit to 16 bit. You can see the little text at the bottom just under the image, just click on it and make sure it is set to 16 bit. That will give you more leeway once you leave the RAW editor and start modifying the photo in normal photoshop. The second thing I have already done here is adjust the white balance. Since we have taken the shot in RAW we are able to completely change the white balance without losing any information.

Alright, back to our problem. There are a few things we can do in this situation in post processing. There are two sliders marked Highlights and Shadows, by decreasing highlights we bring back more of the sky, and by increasing shadows we lift the shadows in the photo. We want a certain brightness on and around the couple. If we increase the shadows by pulling that slider to the right then we can step back the exposure a bit (since the couple is already bright enough), which then allows us to keep even more of the sky. There will however always be a tradeoff between the two, since all these operations work on the entire image. We have to look out for saturating pixels as you usually want to avoid large regions of completely white or completely black pixels. If you hold down the alt key while moving the bar for Highlights, Shadows, Whites and Blacks then the window will display what pixels are getting saturated. This is a really handy trick.
What we want to do is to lighten the bottom half without touching the upper half of the image. There are different ways you can selectively brighten an image. You can either use the brush, and paint in the effect, or you can use the gradient tool. Here I have chosen the gradient tool to brighten the foreground. I choose that the gradient effect applied should be to increase the exposure +0.95 and lift shadows +39. As you can see in the picture below, we now have both a bit of blue tone in the sky, and still can see the couple.
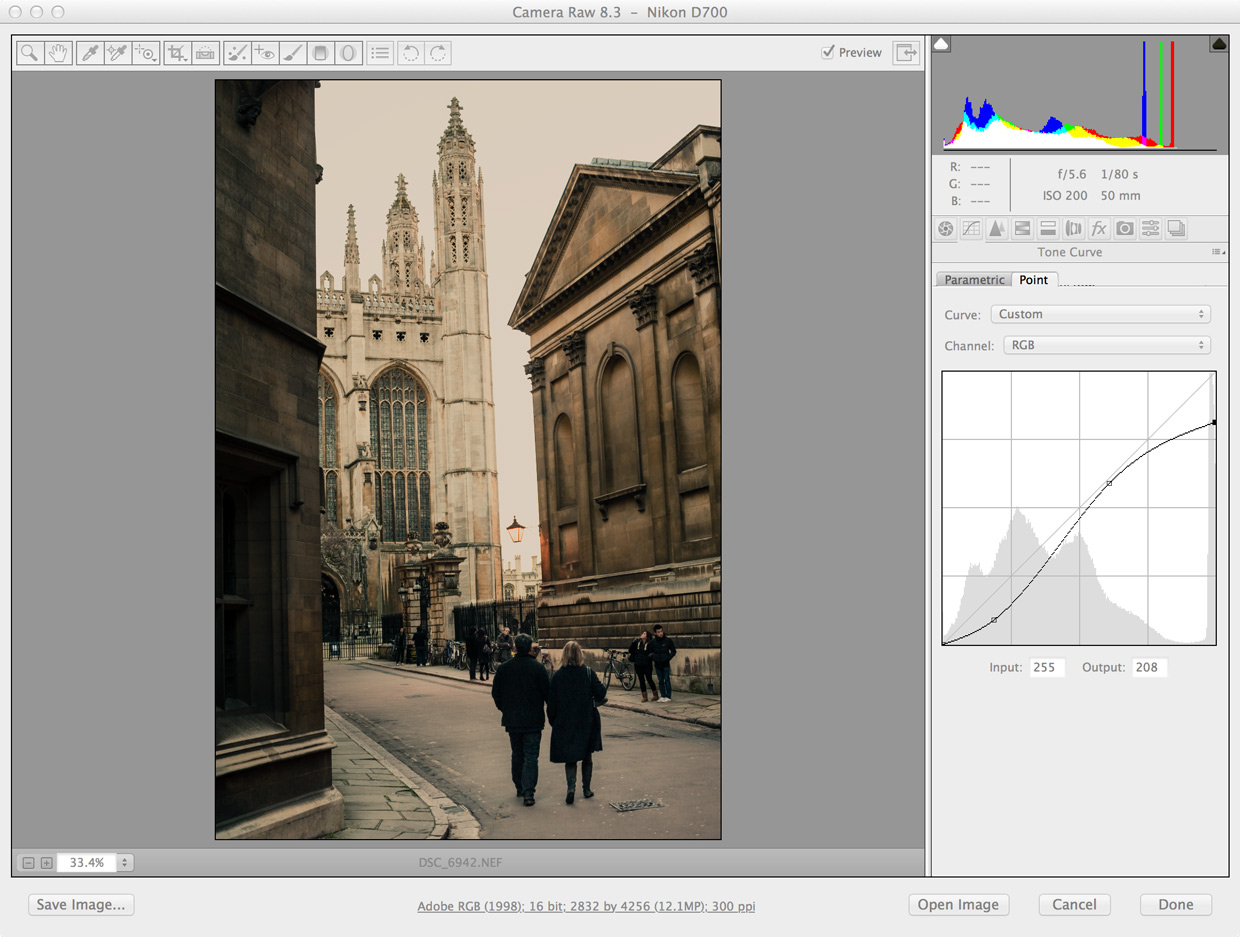
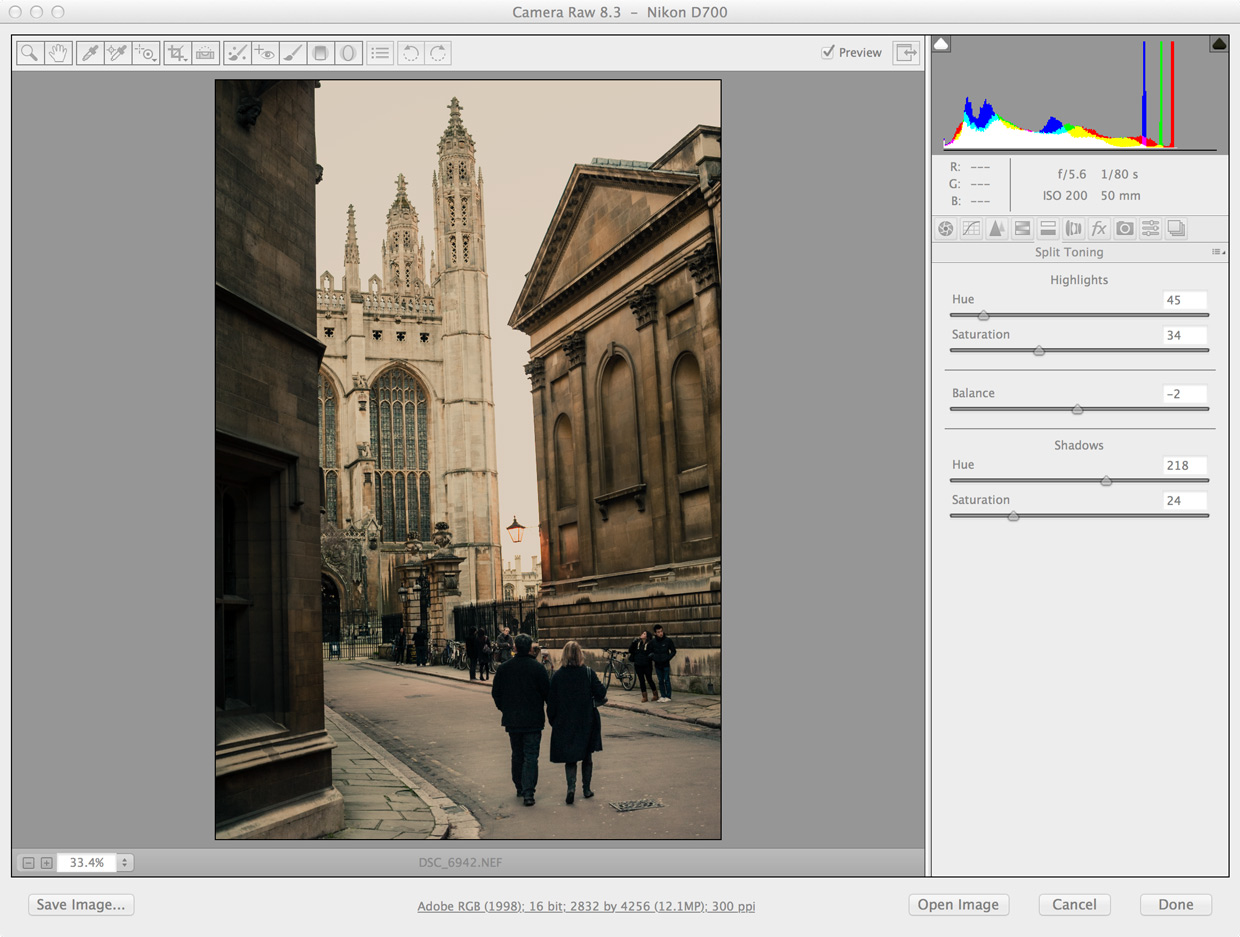
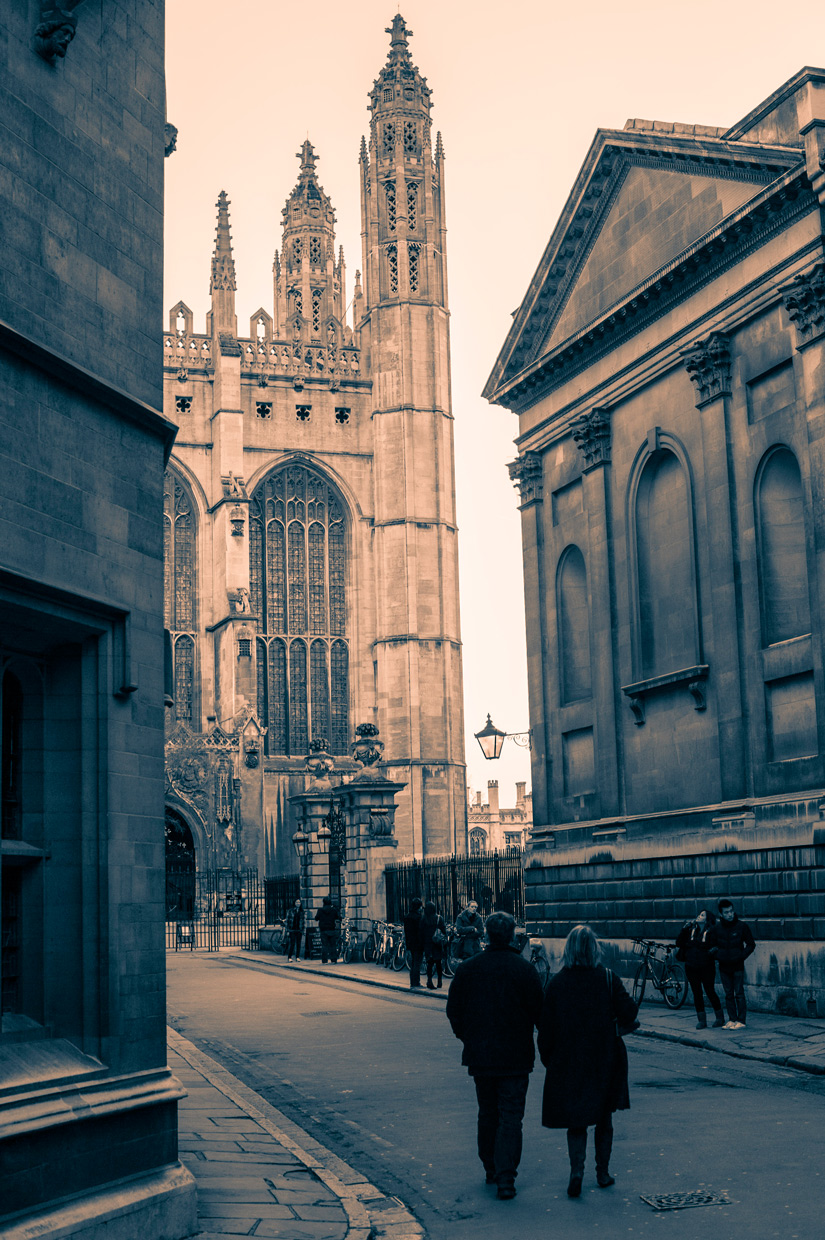
At this stage the photo is pretty much done. These are all things that you could have done in a darkroom while developing your prints. We might consider straightening the photo in photoshop, but it turned out that the slanted houses were probably more due to me pointing the camera upwards, causing the houses to slant inwards. There is perspective control but I never bothered trying that on this photo, instead I started to play with making the photo look really old. You can see the settings in the three images below. I decreased the contrast, manually adjusted the curves to darken the sky a bit, then added split tones which allows you to give the highlights one colour, and the shadows another colour. It is quite fun, give it a try!

The last thing I did was to open it up in normal photoshop, then add a bit of texture in a second layer and set the opacity to 10-20% just to give a hint of it. You can see the finished photo below. I also include the first edit that I did of this photo the same day as I shot it. As you can see they are quite different. Perhaps I should have stopped already above at the stage where I said the photo was done the first time. Anyway, I hope I have shown you a bit what can be done when editing RAW images.
/Johannes
Very nice Johannes, you’re a good teacher in photography!